The Dongar Pro is the first and only parking-mode-enabled plug & play adapter on the market.

It utilizes your auto-dimming rearview mirror as a power source for an easy, invisible, and truly plug-and-play dash cam setup—no messy hanging wires and no complicated fusebox installation.

Equipped with three versatile power modes – ignition, timed, and continuous – it allows you to safely power your dash cam, even when parked.

What's included:

Dongar PRO USB Module

▸ Toyota Cable Pack (3 wiring harnesses)

▸ Shorty USB cables to connect to any USB-powered device


* To power your dash cam, you'll also need a micro SD card.
  • 5-PIN

    For roof-cavity installs in the new Tacoma, Land Cruiser, 4Runner, Sienna, and more.

  • 10-PIN

    For rearview mirror installs in the new Tacoma, Land Cruiser, 4Runner, and more.

  • 12-PIN

    For rearview mirror installs in older models of the Tacoma, Tundra, Sienna, and more.

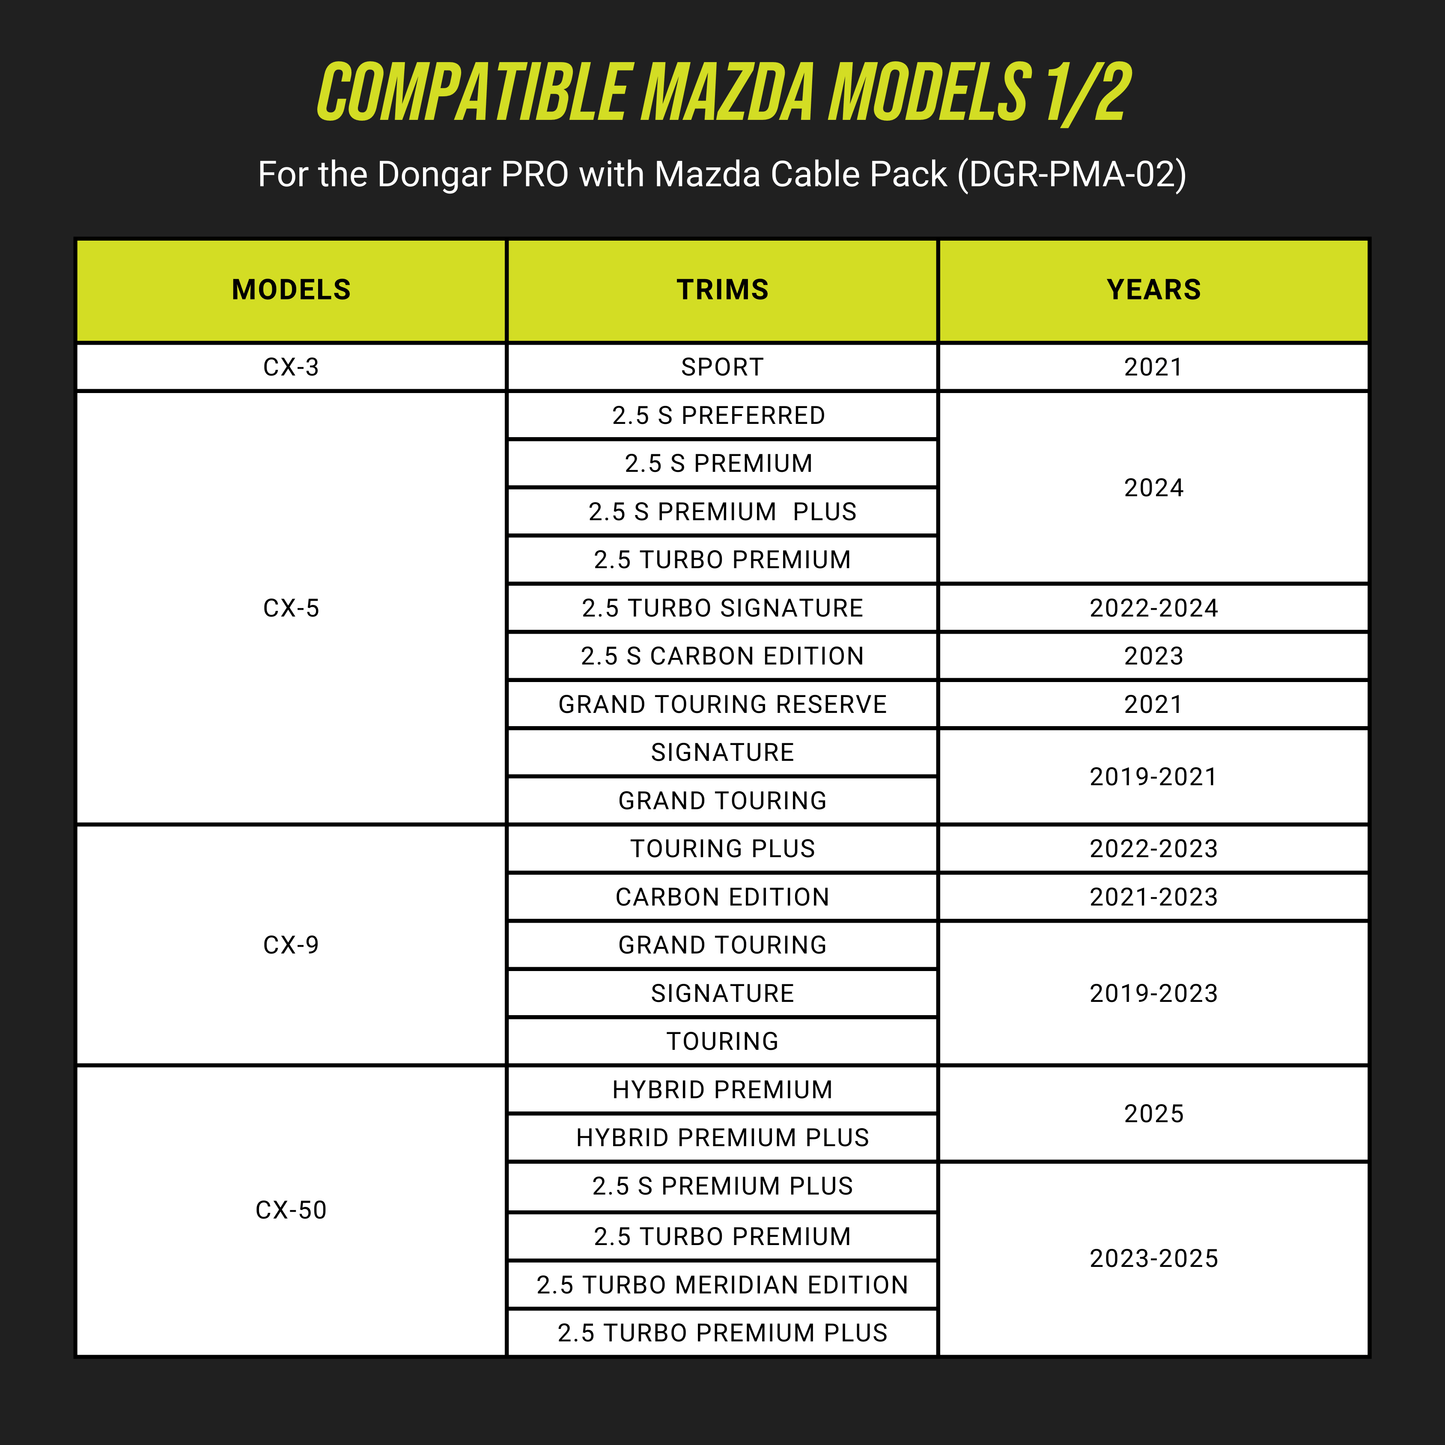
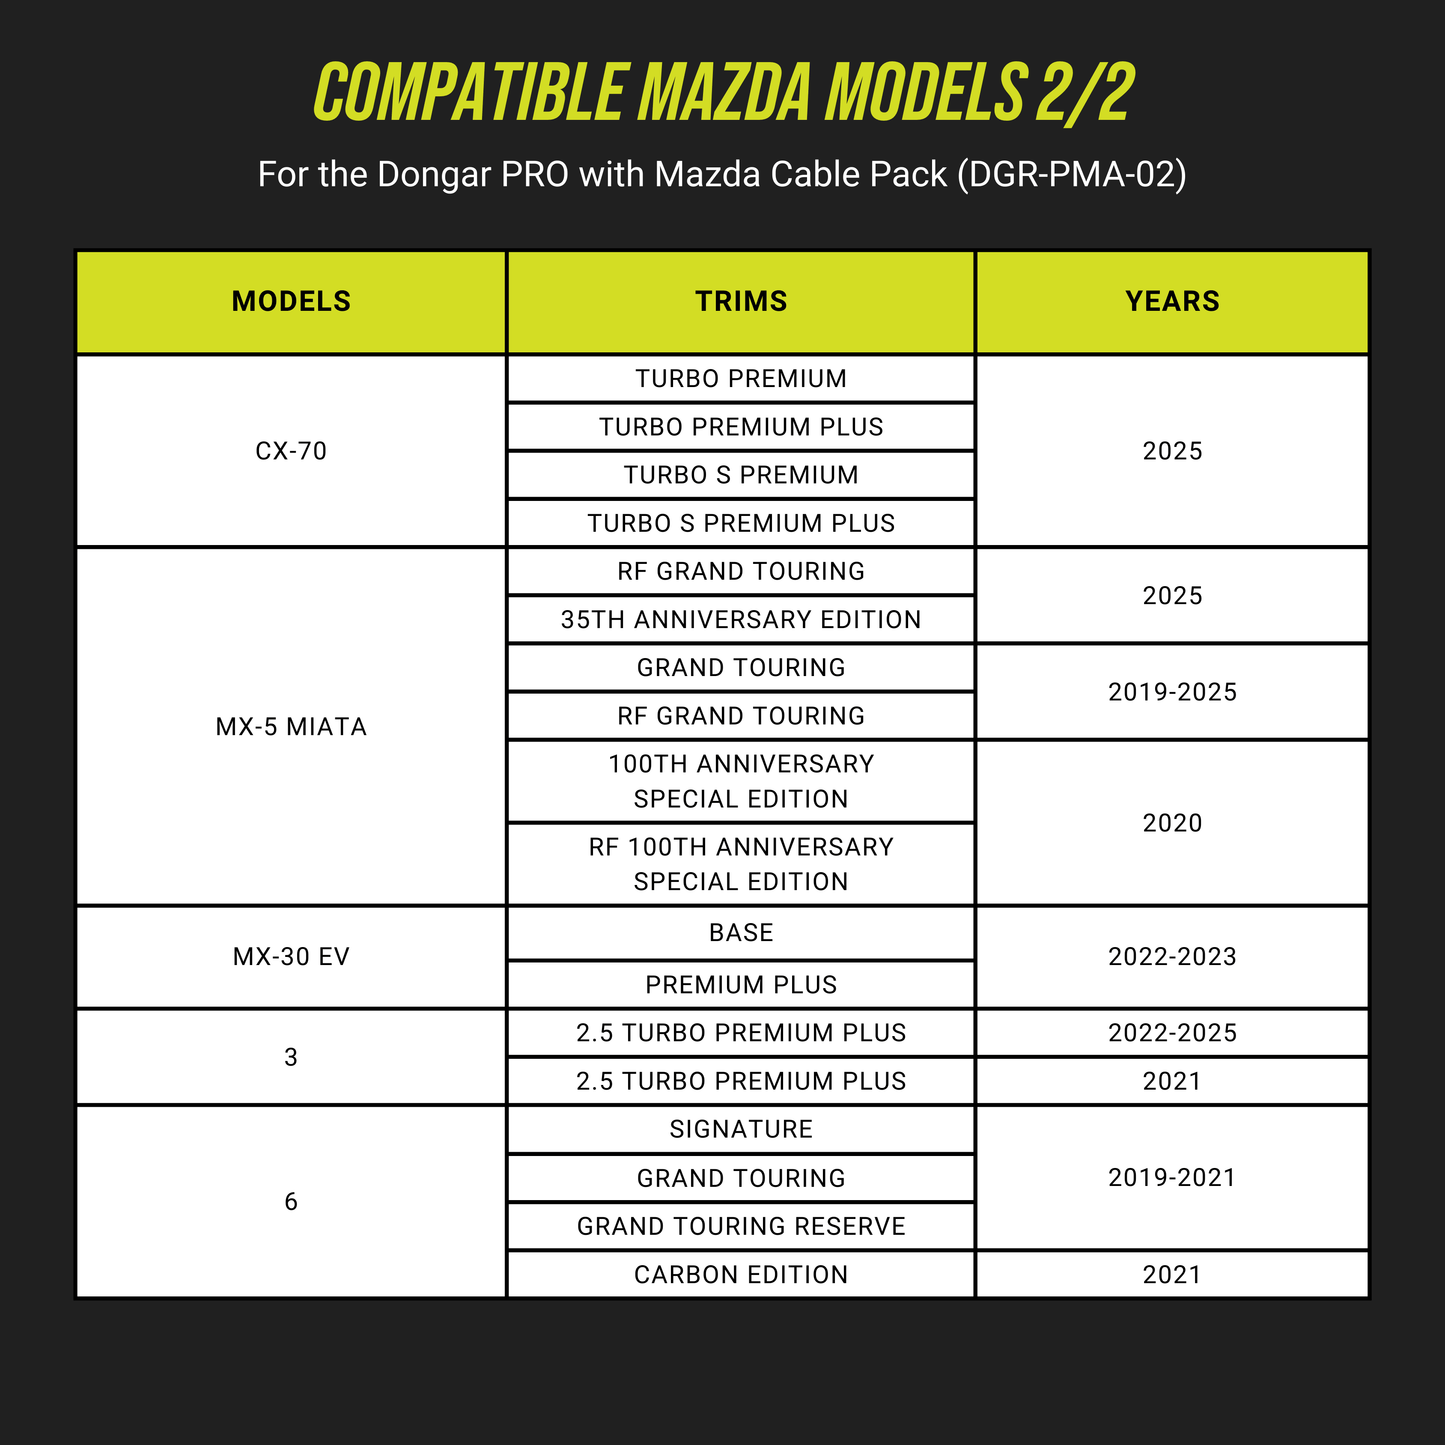
COMPATIBILITY:

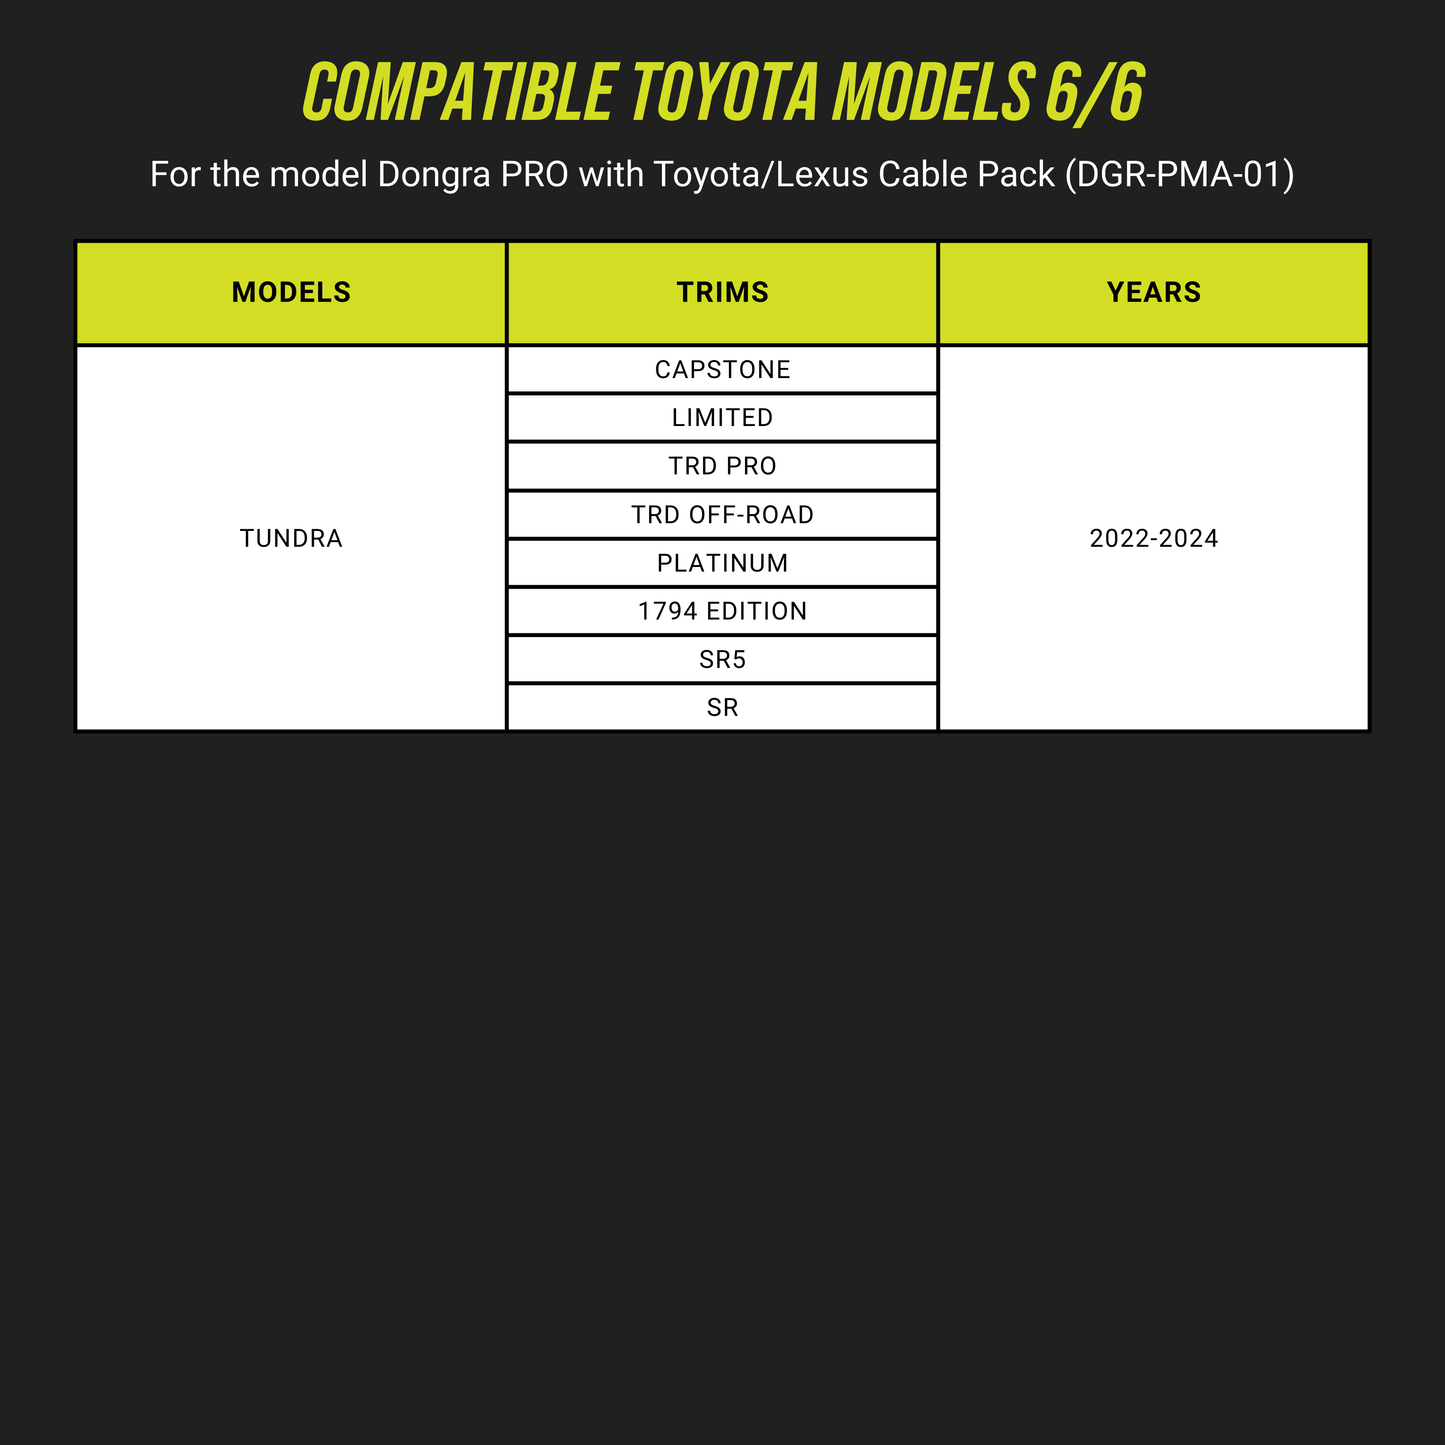
TOYOTA COMPATIBILITY:

NOTE: DO NOT UNPLUG THE TOYOTA SAFETY SENSE. Most Toyotas have a 12-Pin Safety Sense Connector that can easily be confused with your rearview mirror connection. Do not unplug this. Instead, search for the additional 10-Pin connector (under your plastic shroud), 12-Pin connector (behind your rearview mirror), or 5-Pin connector (in your roof cavity).

Image

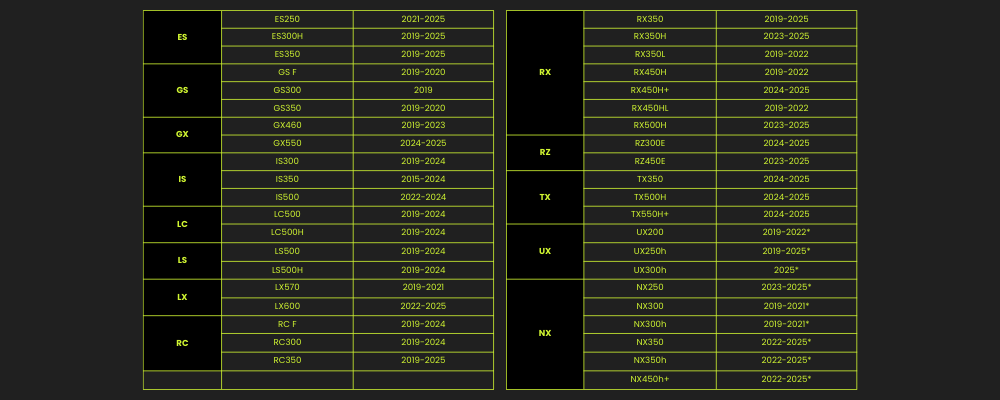
LEXUS COMPATIBILITY:

Image

HOW TO INSTALL

(For the 2024+ Tacoma, Land Cruiser, 4Runner, and Sienna, we recommend a roof-cavity install with the included 5-pin harness).


Roof-Cavity Install:

  1. Remove the domelight assembly by placing your fingers at the front of the assembly (closer to windshield) and gently pulling down.
  2. Locate the 5-pin connector port within the domelight cavity and connect the 5-Pin PRO harness to it. Route the 3-pin end of the same harness through the headliner.
  3. Connect the 3-pin head to the Dongar PRO USB module and plug your dash cam in to the USB-C port. Turn [ON] your vehicle and ensure the dash cam is receiving power.
  4. Once you have confirmed the dash cam is receiving power, mount the dash cam and PRO adapter on a clean spot on the windshield and re-assemble the plastic shroud.

Rearview Mirror Install:

  1. Tilt your mirror down for easier access to the back of the rearview mirror. (If your rearview mirror is shrouded, this will also provide better access to the shroud. To remove the shroud, place your fingers between the headliner and smaller panel piece and pull straight down. The larger panel can be removed by sliding it down and away from you.)
  2. Locate and unclip the mirror's connector. Then, plug the matching (either 10-Pin or 12-Pin) male end of the PRO harness into the mirror's female port. [NOTE: Most Toyotas have a 12-Pin Safety Sense Connector that can easily be confused with your rearview mirror connection. DO NOT UNPLUG THIS. Instead, search for the additional 10-Pin connector (under your plastic shroud) or 12-Pin connector (behind your rearview mirror).]
  3. Plug the male end of the original mirror connector into the female end of the PRO harness. Plug the smaller 3-pin head into the PRO USB module.
  4. Connect your dash cam to the USB-C port on the PRO module. Turn [ON] your vehicle and ensure the dash cam is receiving power. Once you have confirmed the dash cam is receiving power, mount the dash cam and PRO adapter on a clean spot on the windshield.
  5. Route the cables accordingly and re-assemble the plastic shroud.