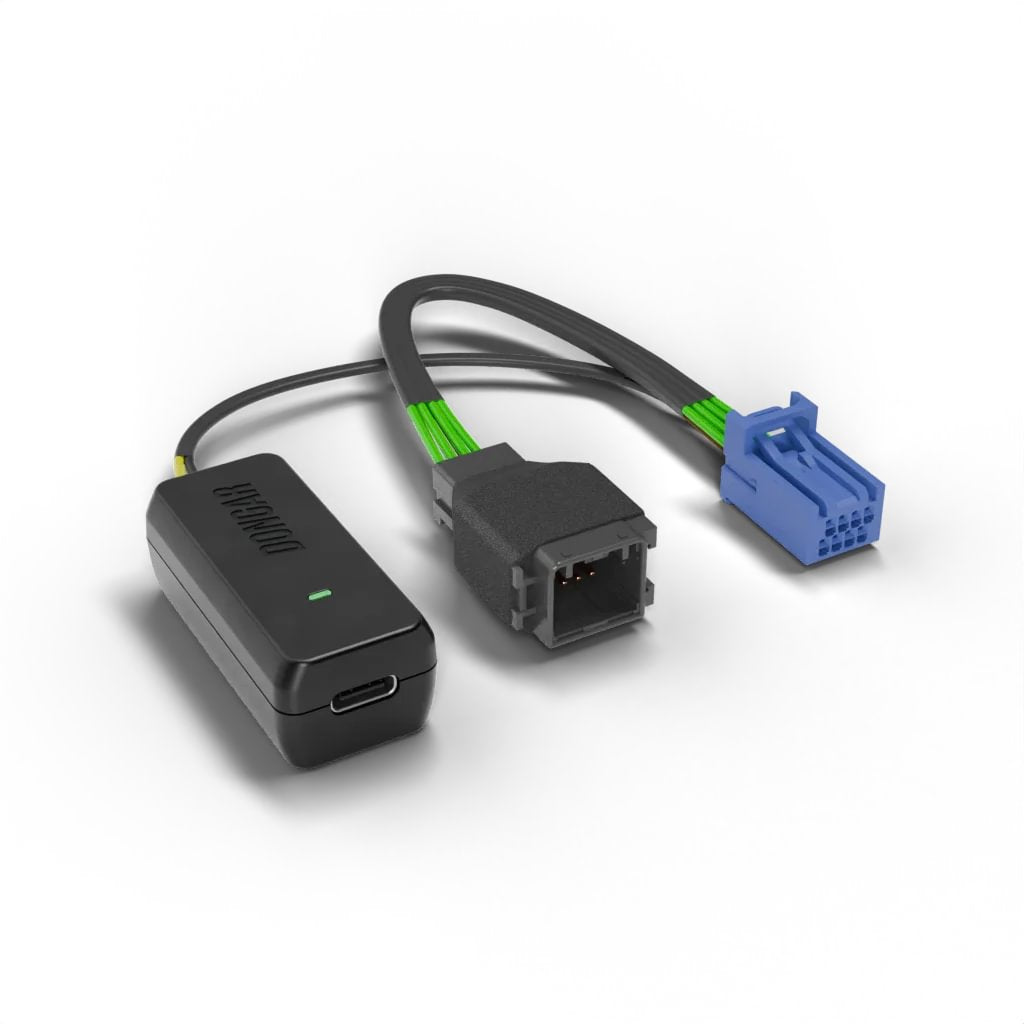
I recently upgraded our 2018 Honda CRV to a 2026. Both were Touring models with an auto dimming rearview mirror. I used Dongar’s 7 PIN Adaptor for the 2018 and recently purchased the 8 PIN adapter for the 2026 and my Garmin 57 Dash Cam.
The install went very well - maybe 1 hour to complete (went very slowly not to break anything) and my Dash Cam is back up and running. My only criticism on my purchase experience (and it is not a fault of Dongar) is that the shipping was over 3 weeks to Canada. It was a long wait and I had to email Dongar to see when the adapter would be delivered.
If you are interested I outline my procedure of the install below with pictures:
I first watched this YouTube several times to see how to take the plastic trim piece apart on the CRV.
IMG_1
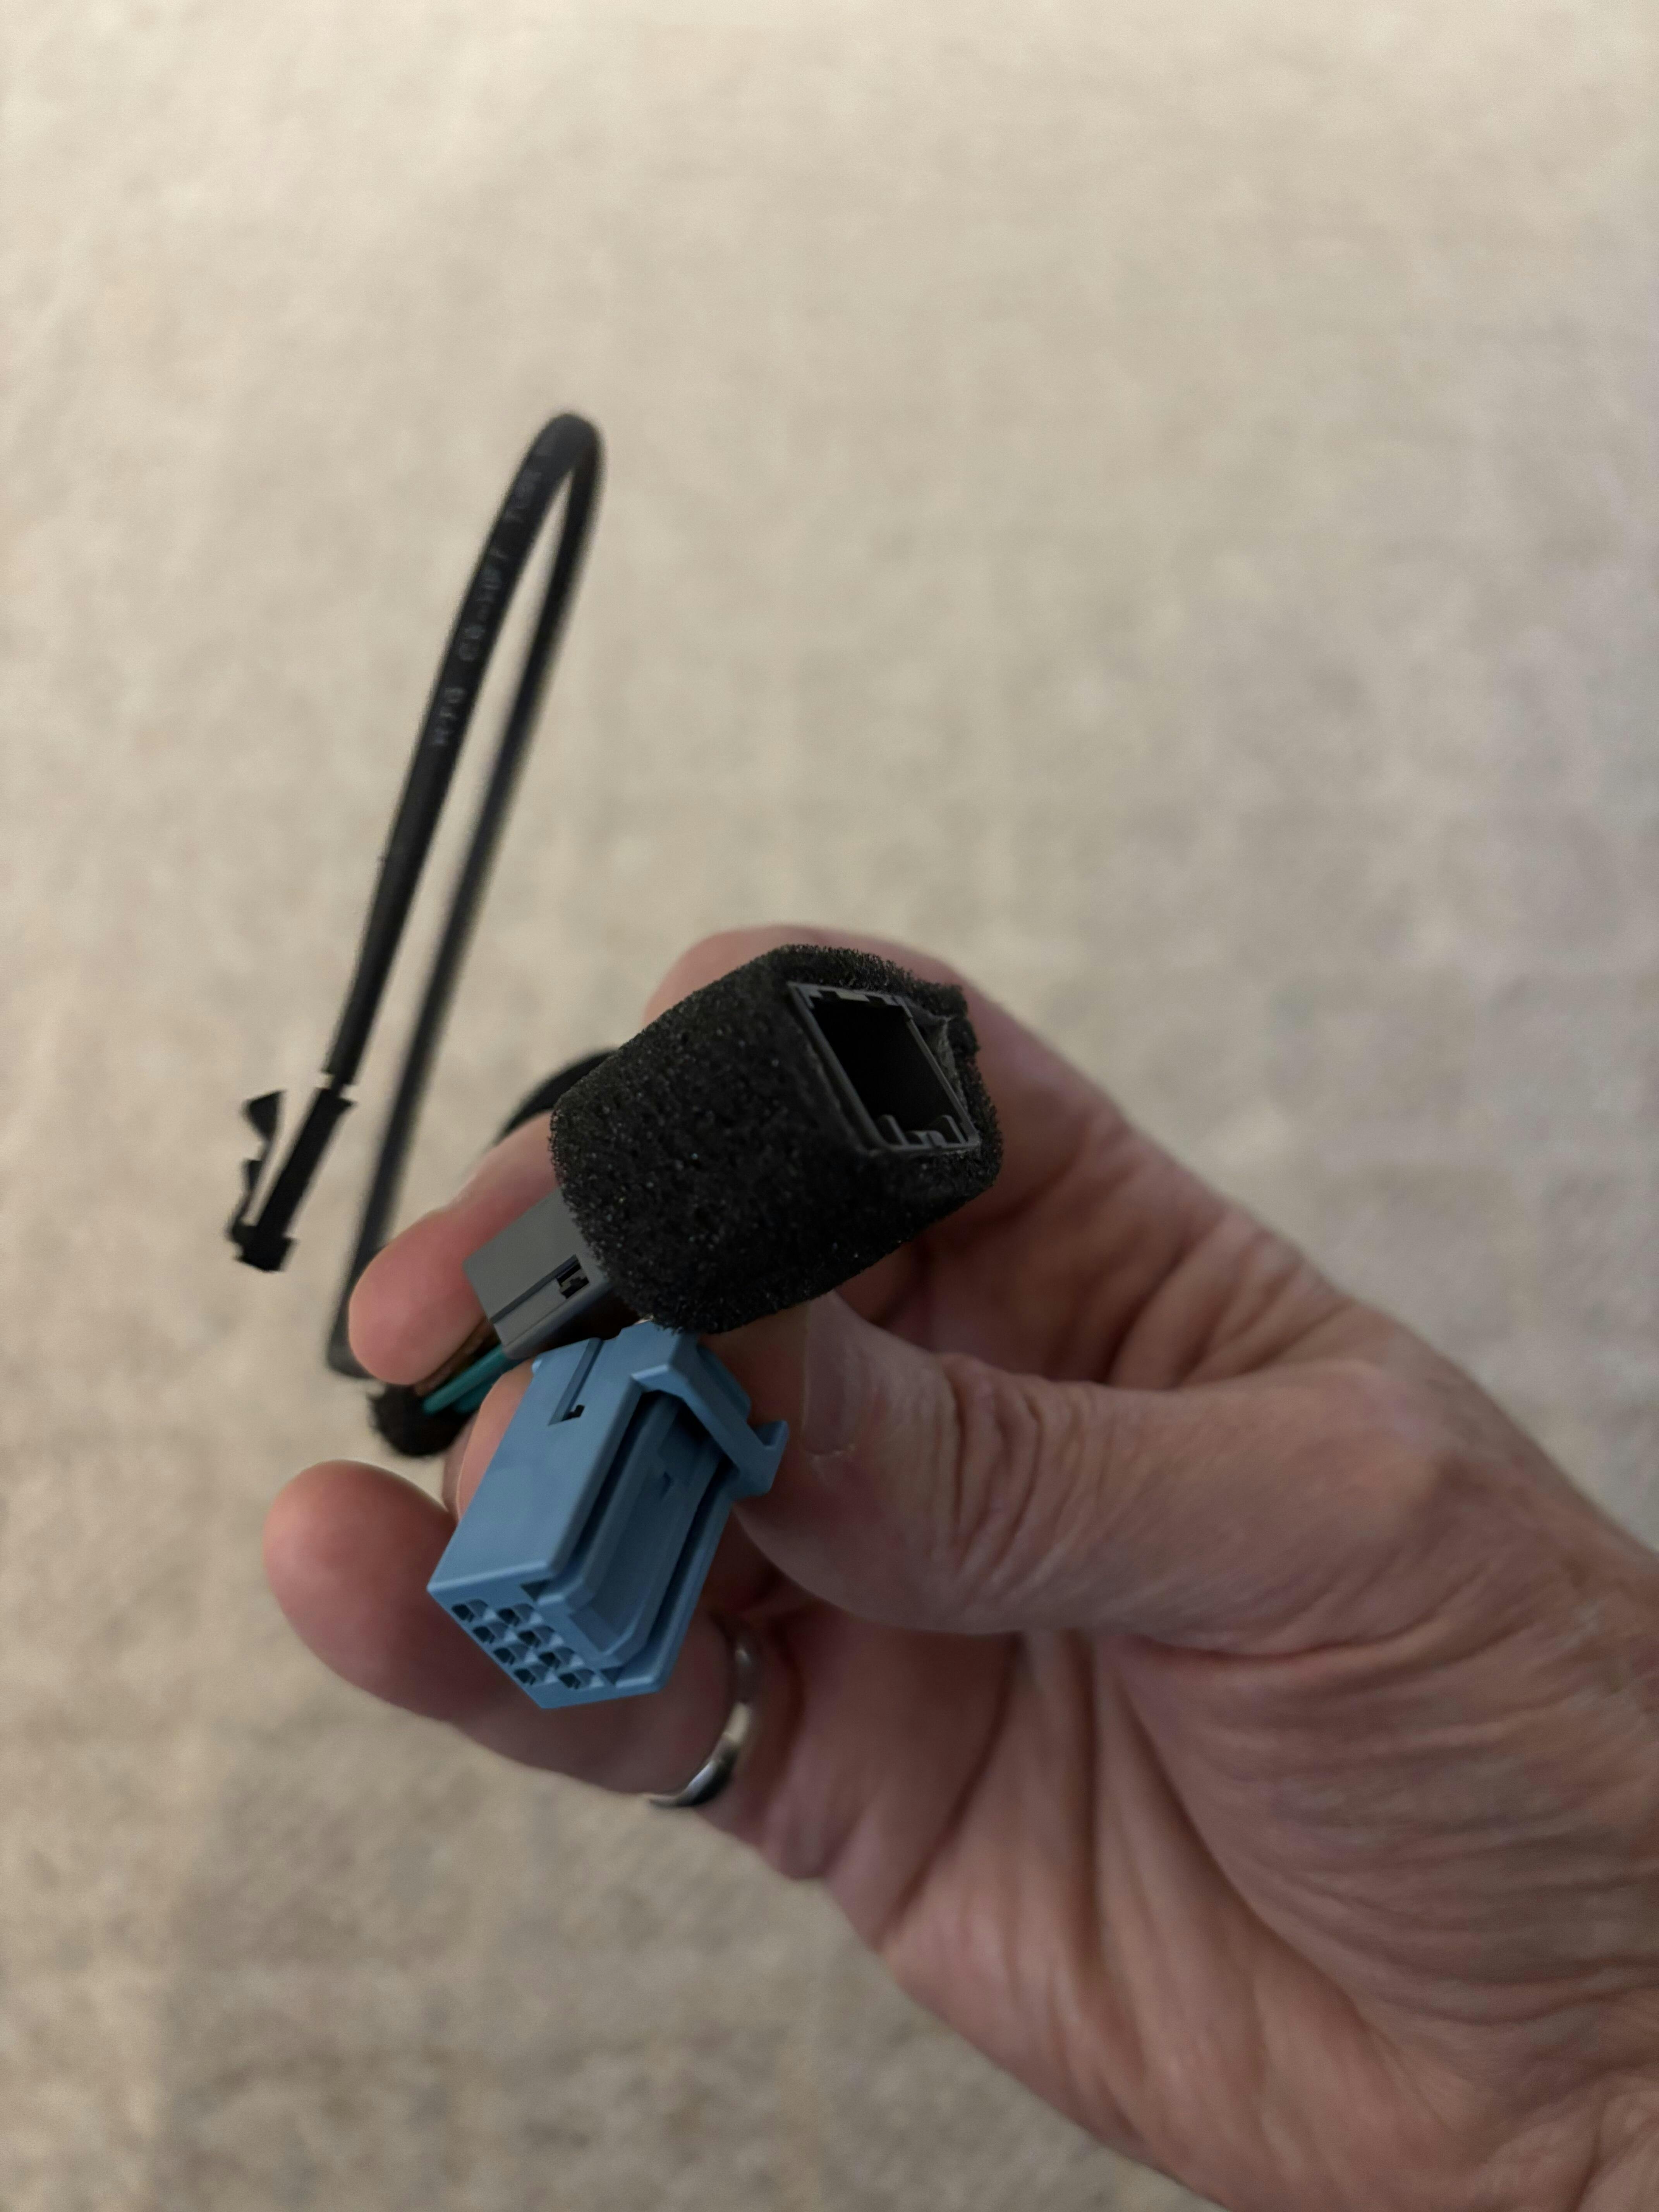
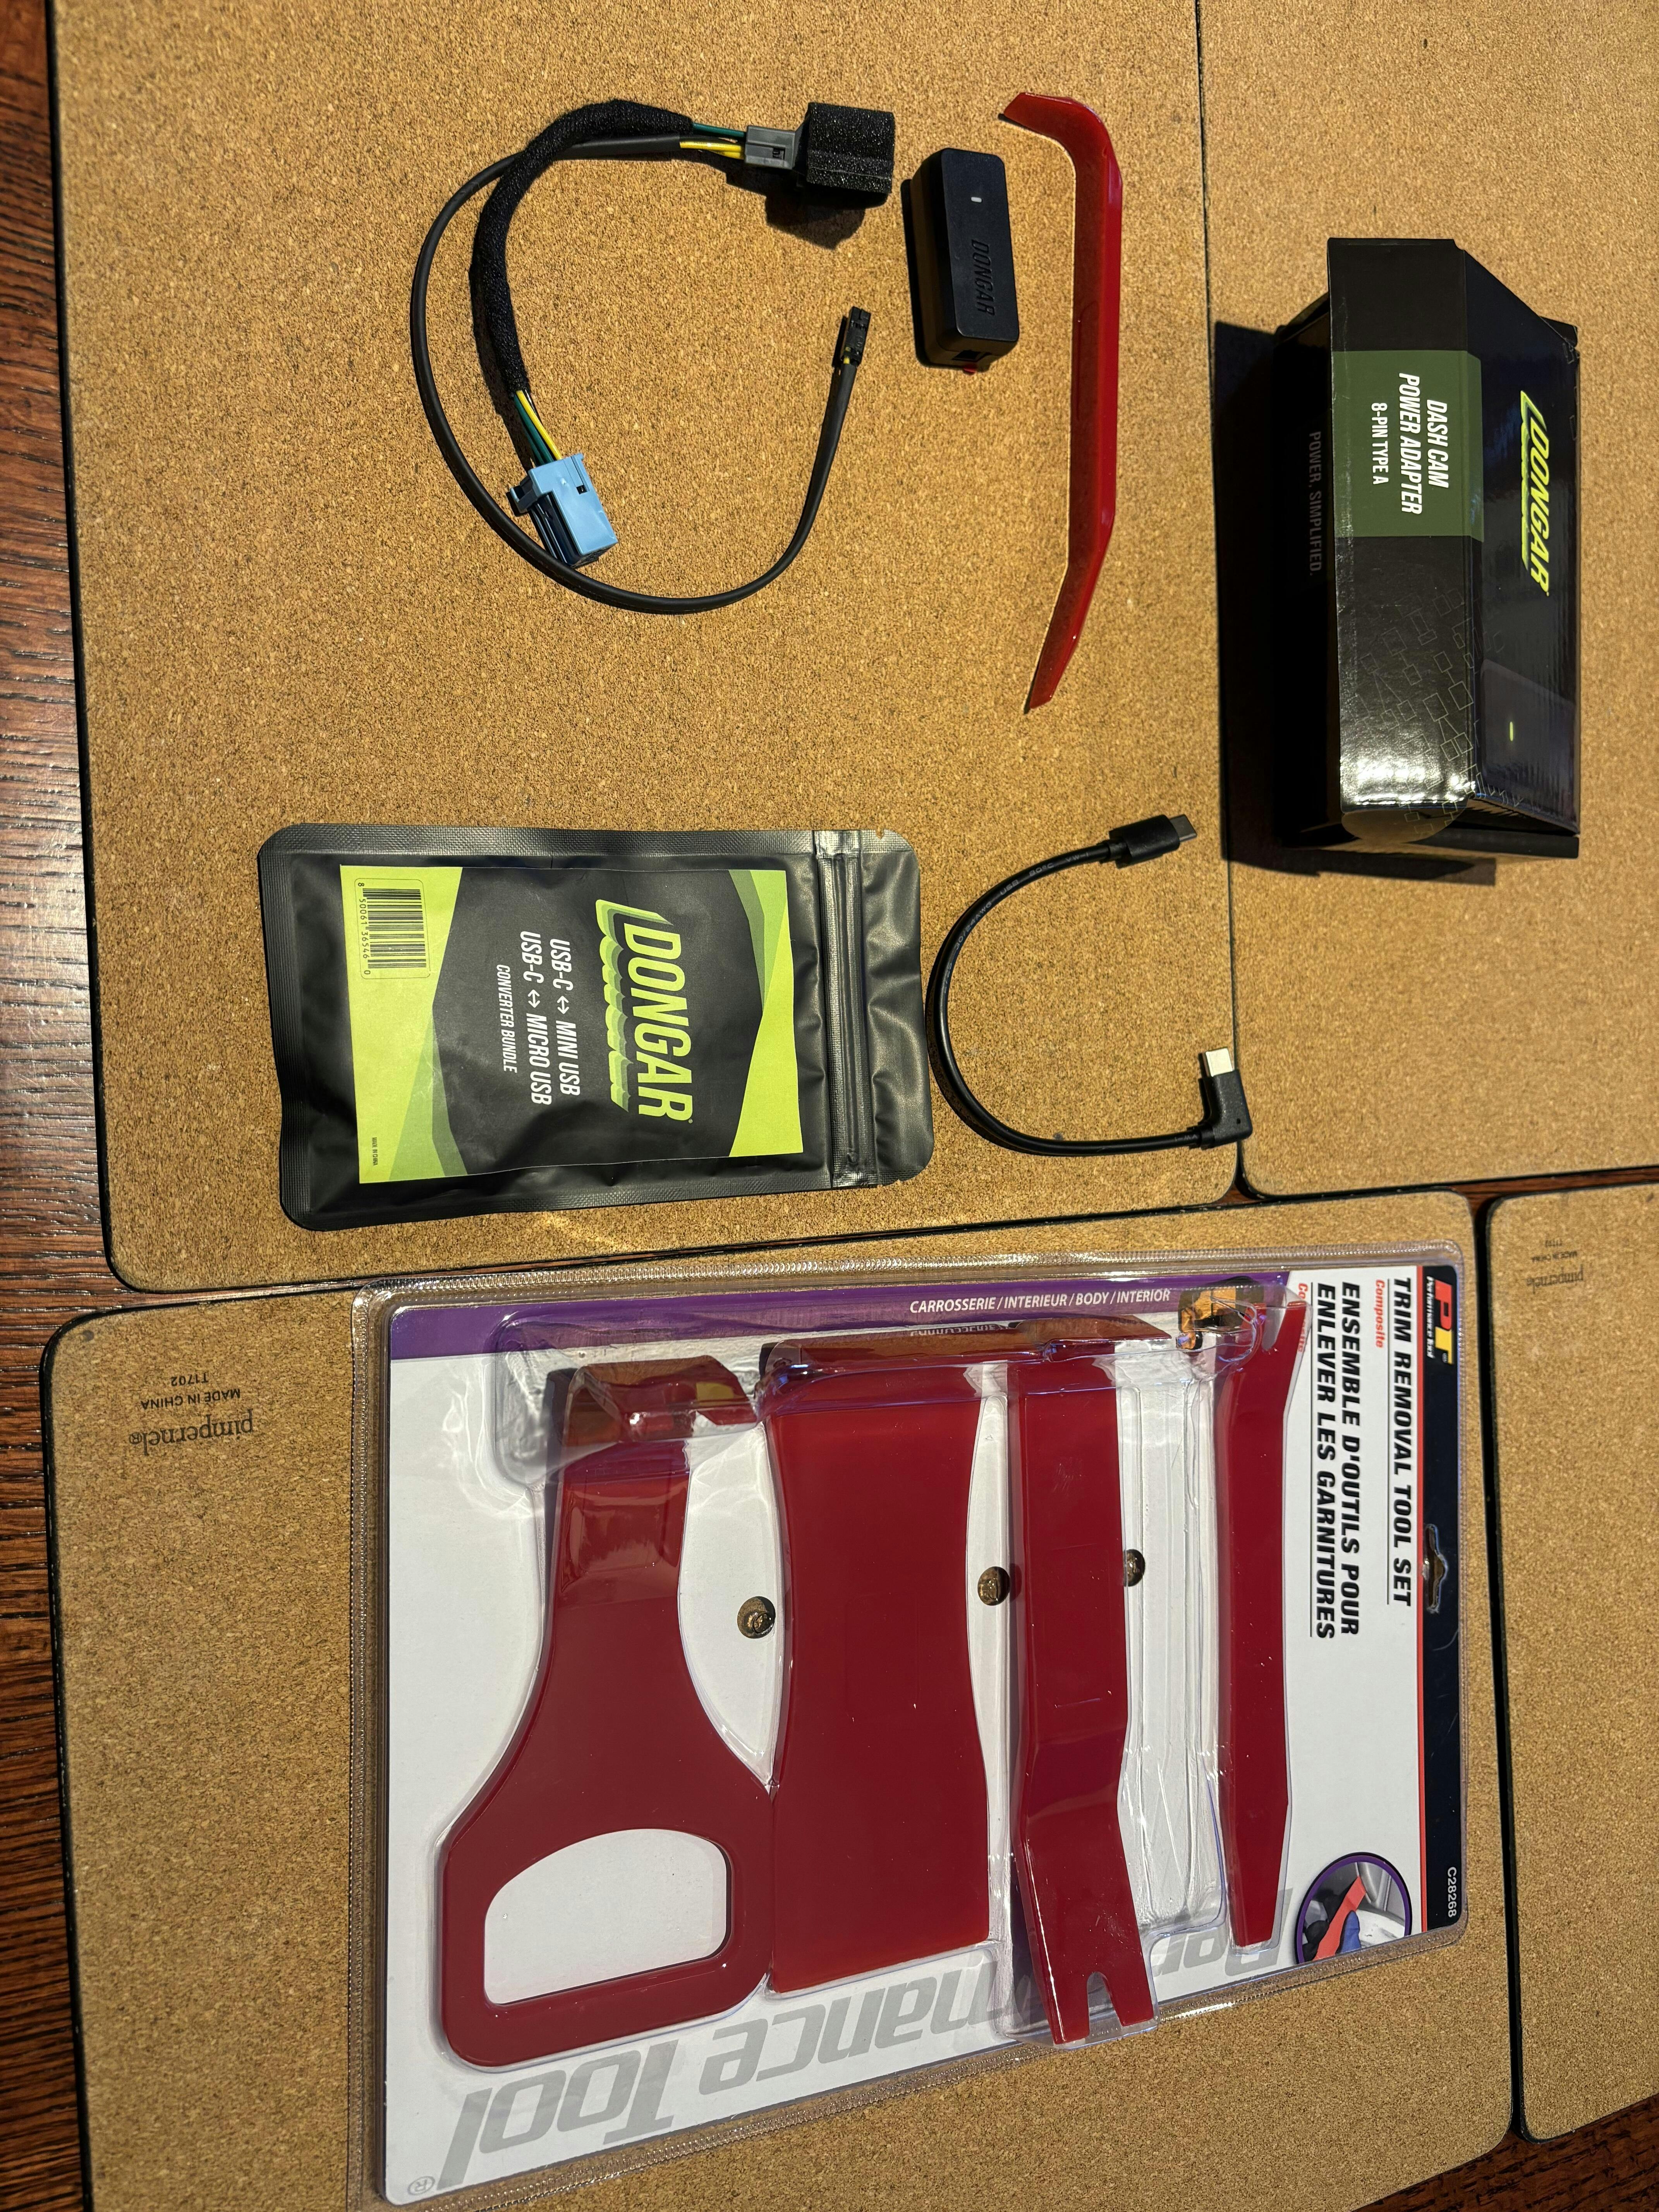
Stuff I bought: Dongar 8-PIN Adapter and Dongar USBC to Micro USB cable for my Garmin 57 Dash Cam. I also purchased a trim tool kit from Princess Auto. Only used the one that I show taken out of the package and only needed it to initially pull down on the plastic trim piece then I was able to take the piece off as described in the above YouTube .
IMG_2
Shows how I looped the Male connector / Female connector/ wire connector to fit it all in under the plastic trim piece.
IMG_3
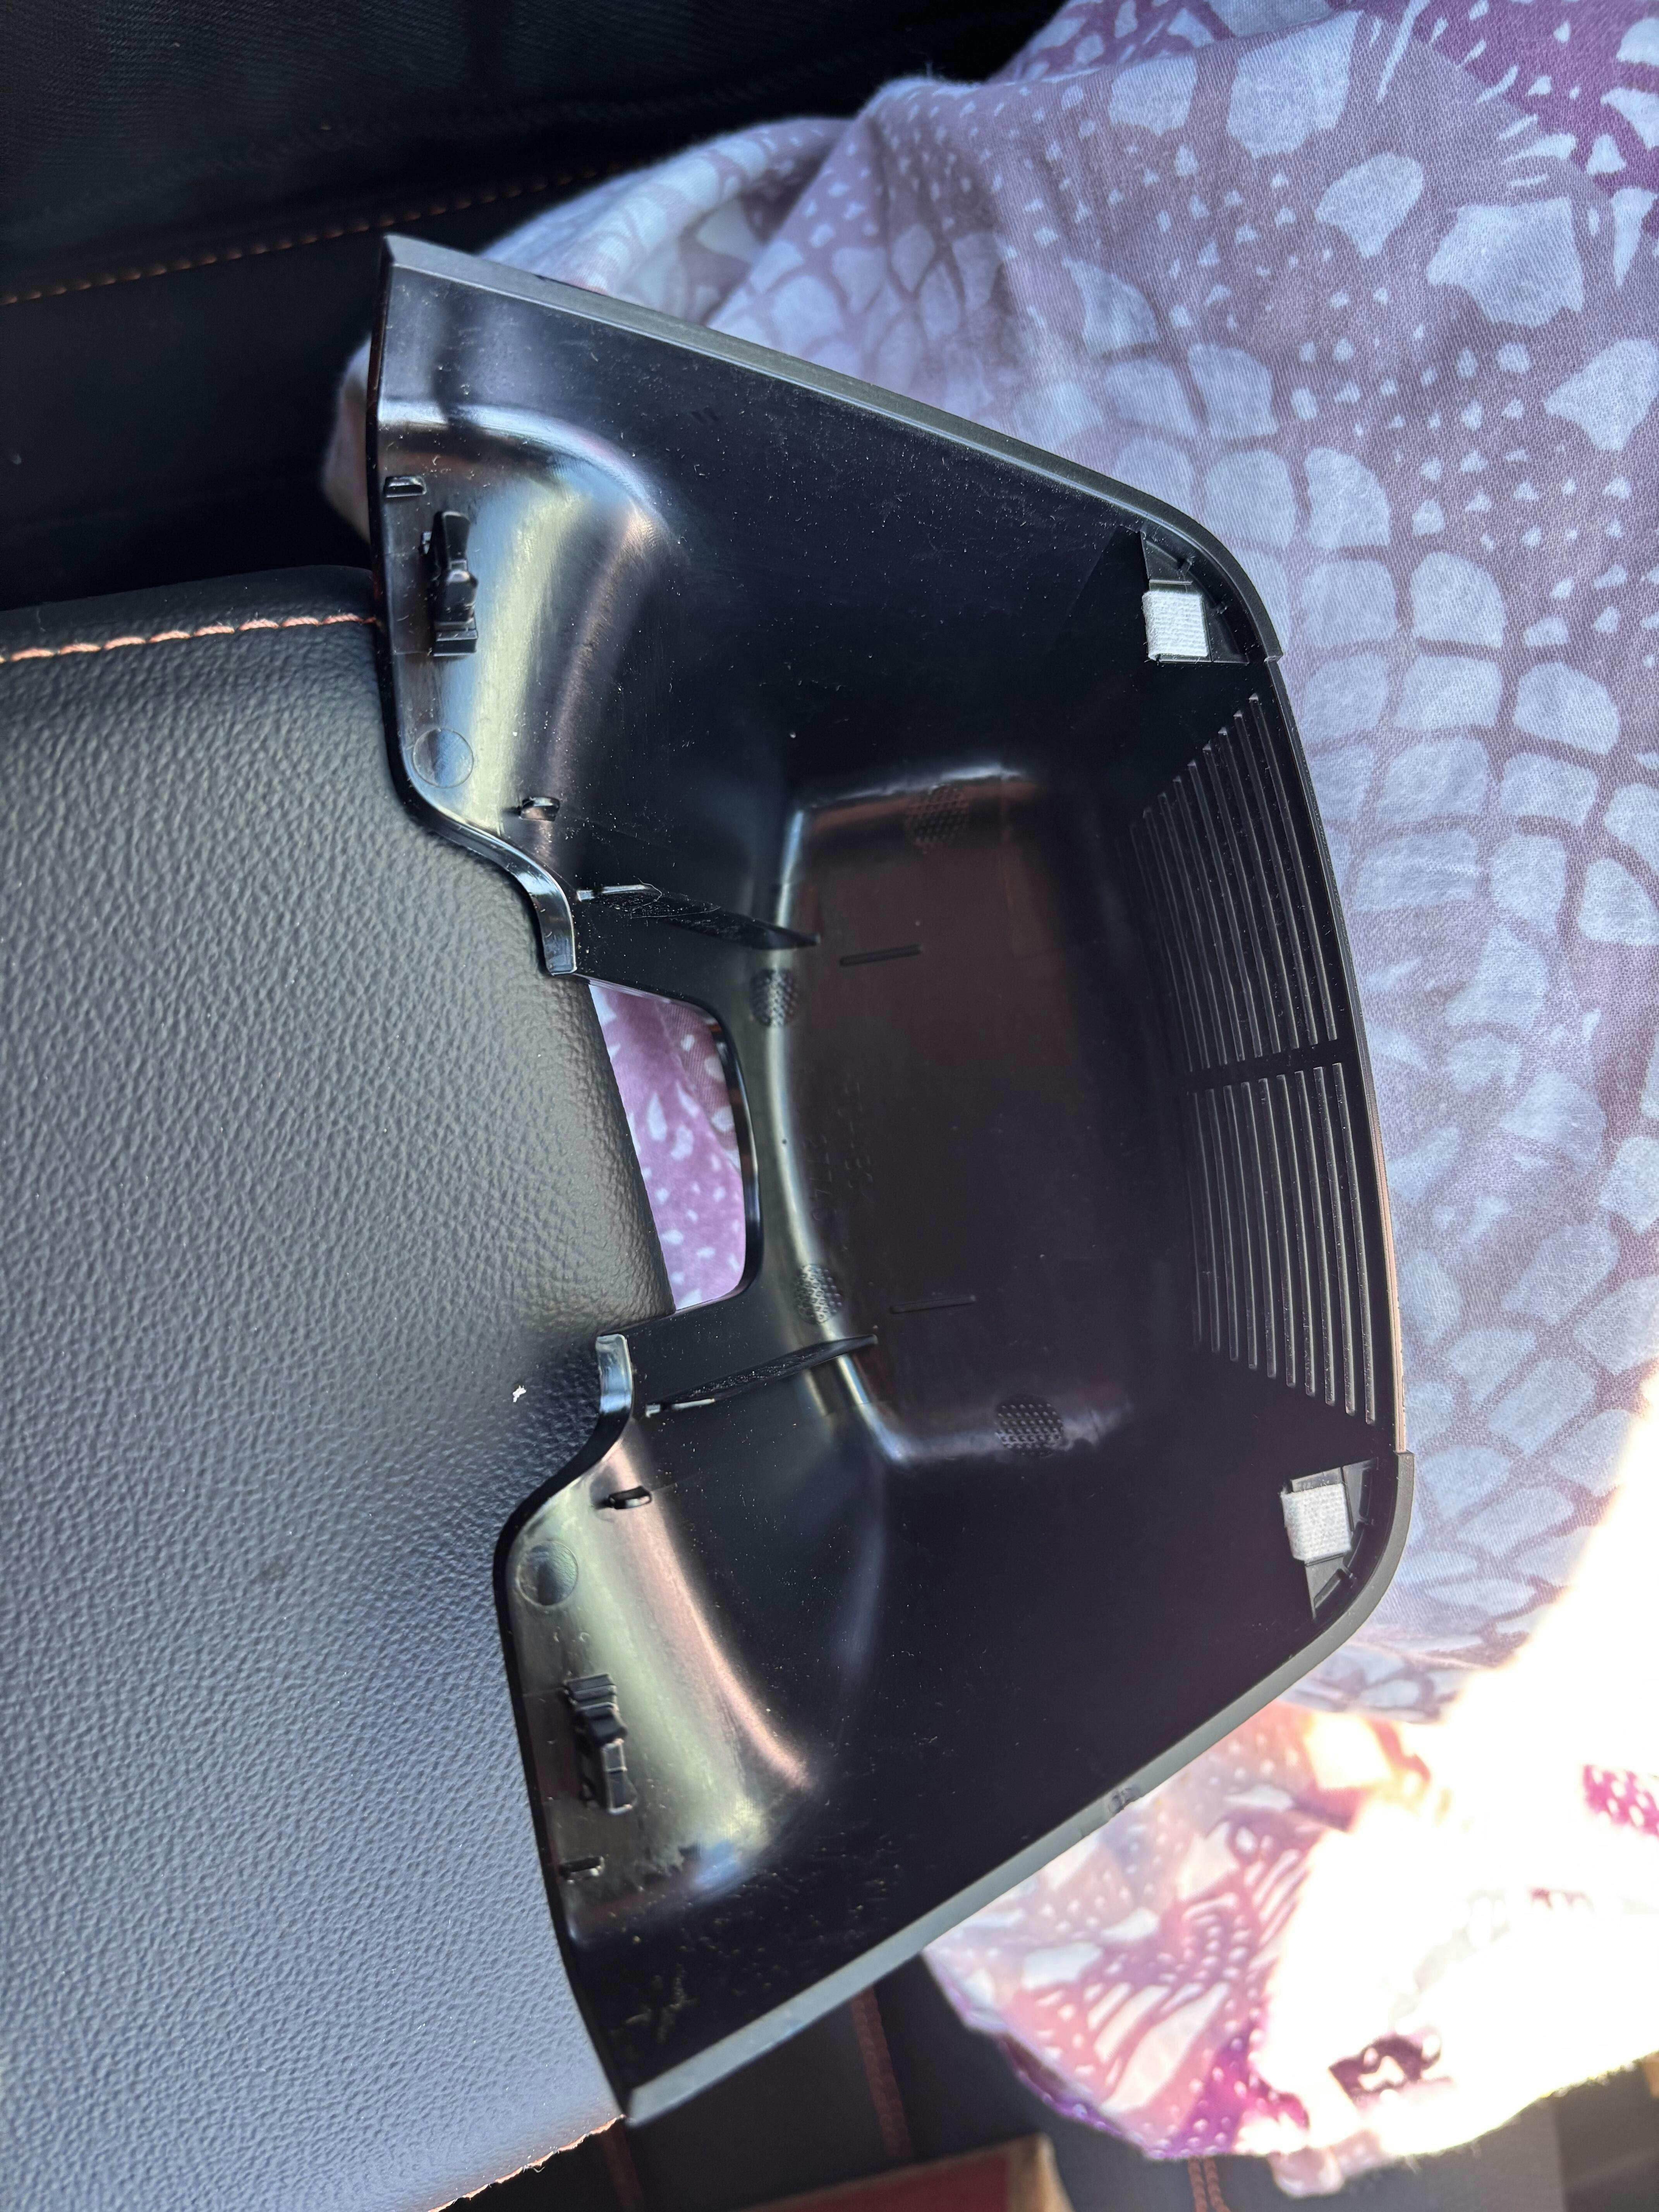
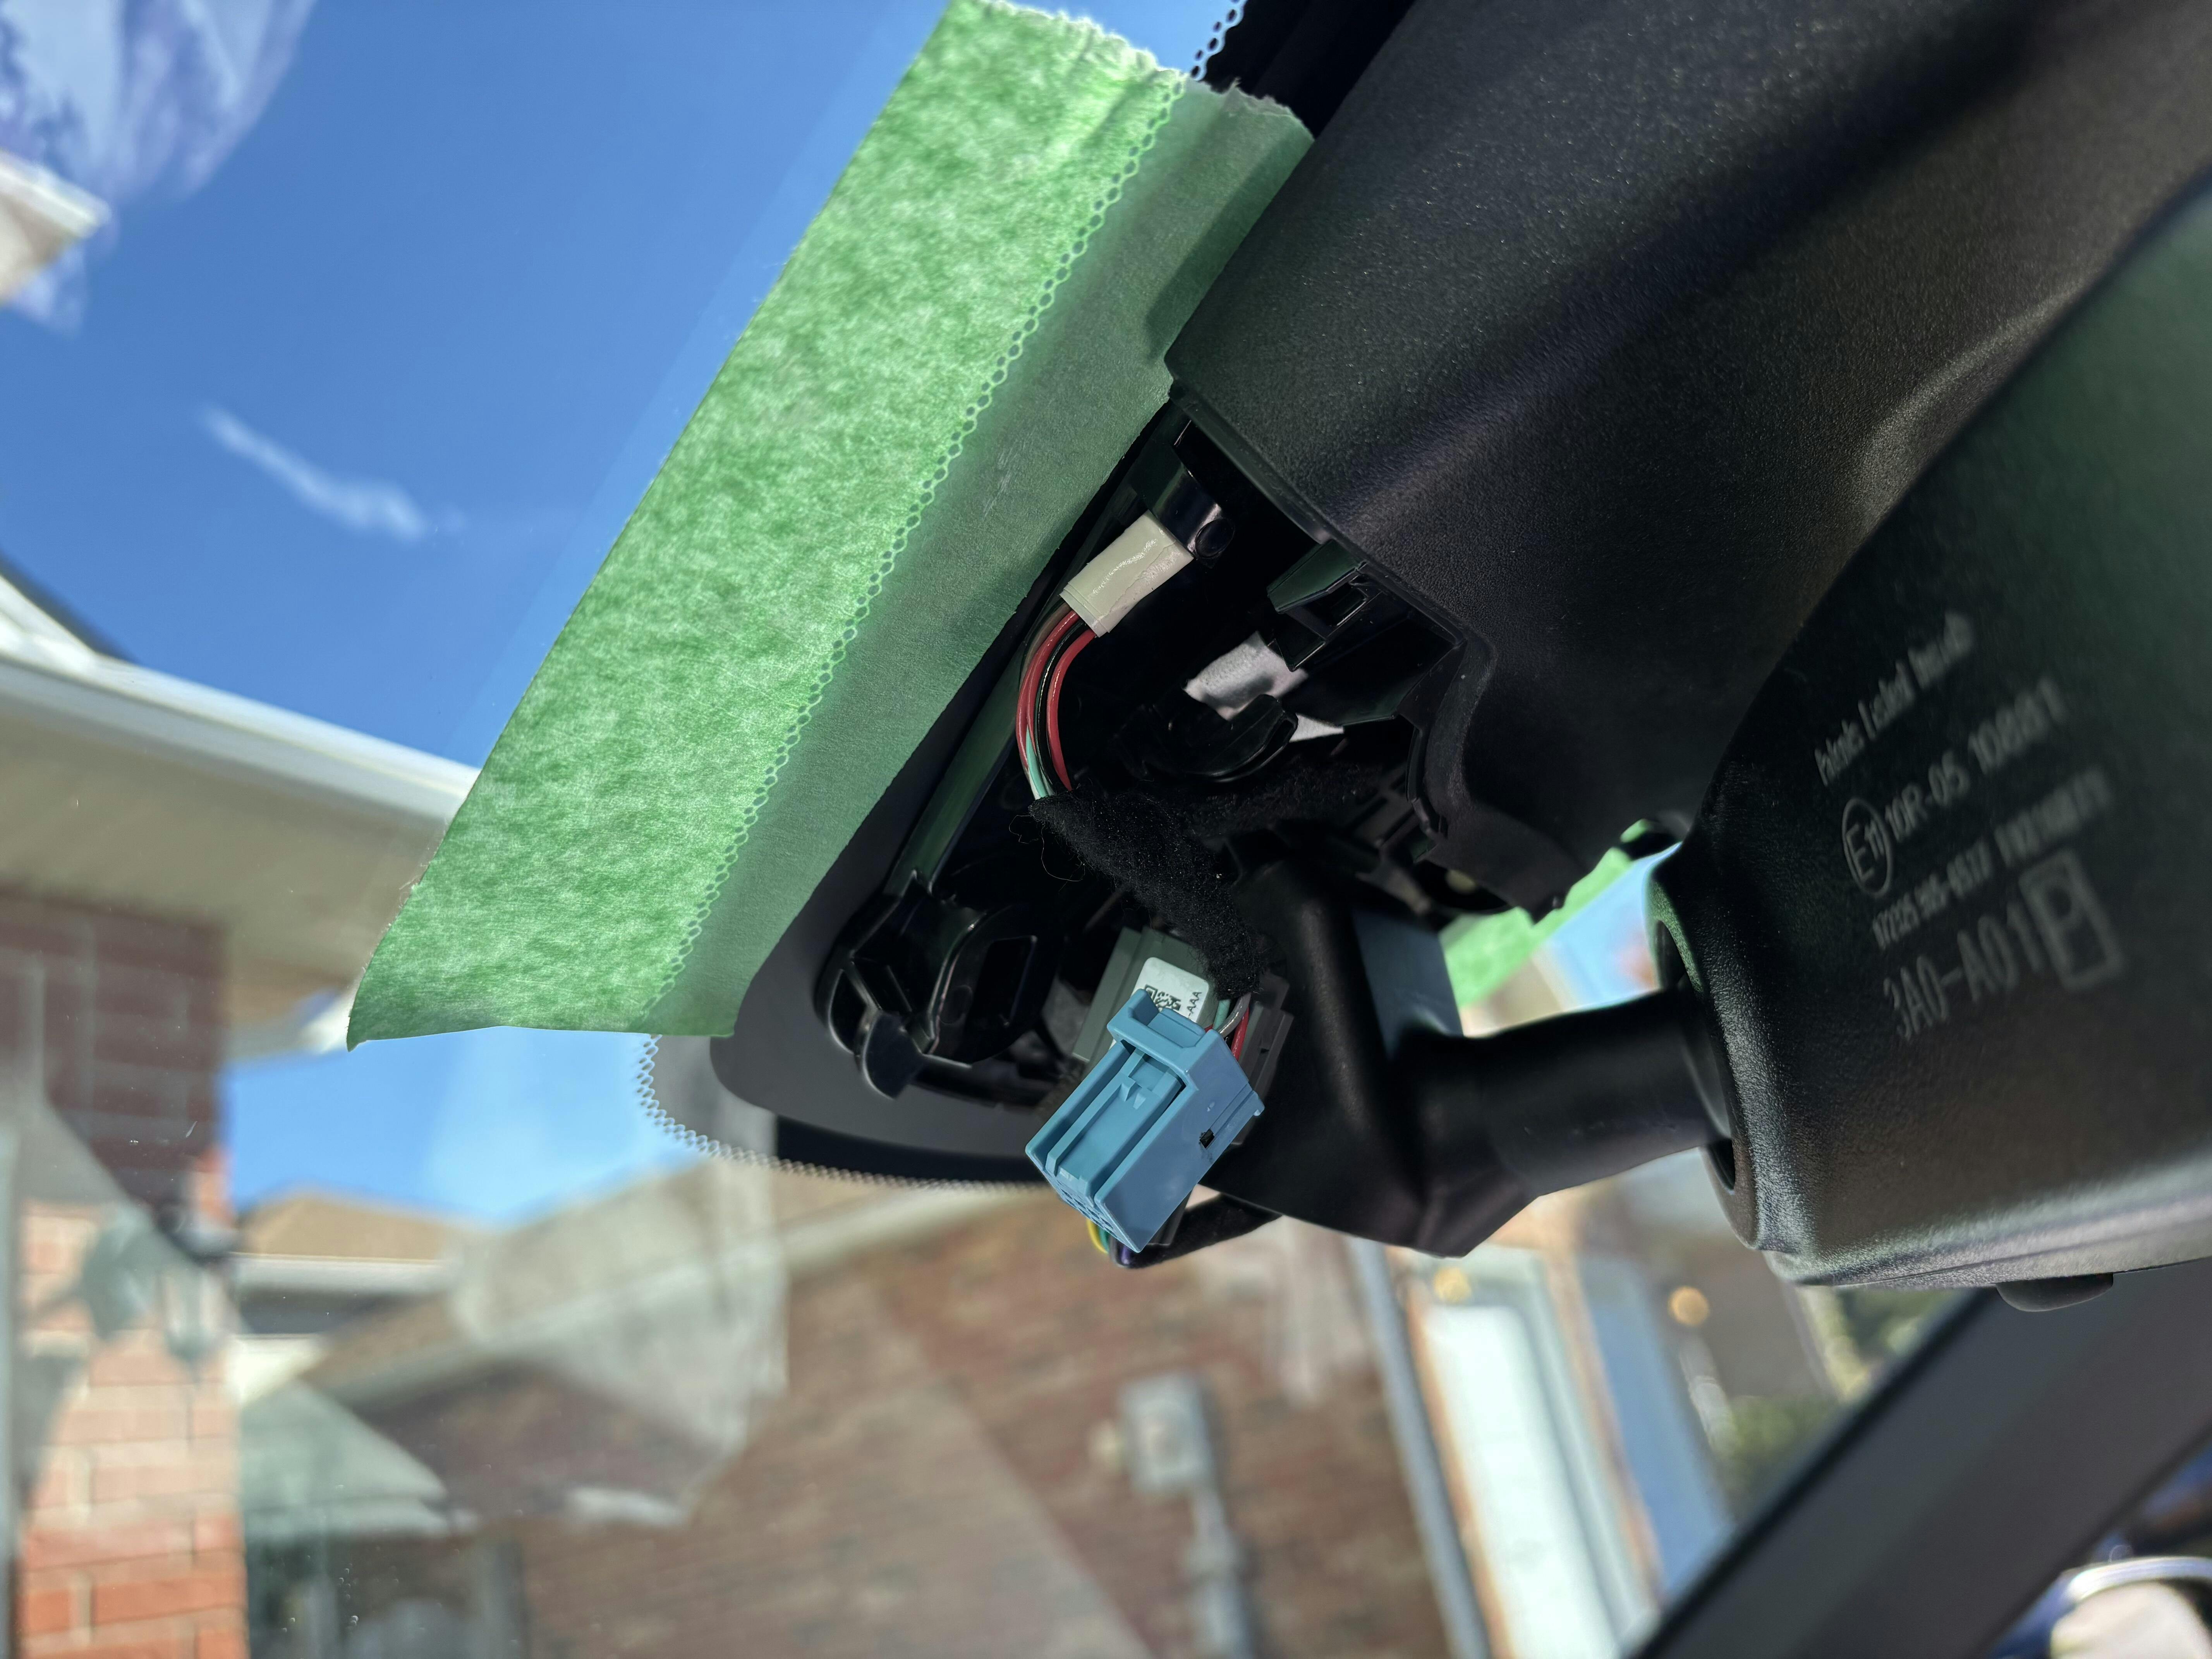
Shows the CRV’s plastic trim piece upside down I removed as per the YouTube . The 2 white clips on the right (point to the front of the CRV) are the clips the YouTuber says you pivot on after you have pulled down on the part on the left. Apply force as close as possible to the black clips (shown on the left of the part). This will be sort of in the middle of the CRV’s camera assembly on the windshield. (Again, I first used the “J” trim tool to start then I used my fingers on both sides to apply a bit more force and to pivot the piece on the white clips. I must say it was a bit scary but nothing broke).
IMG_4
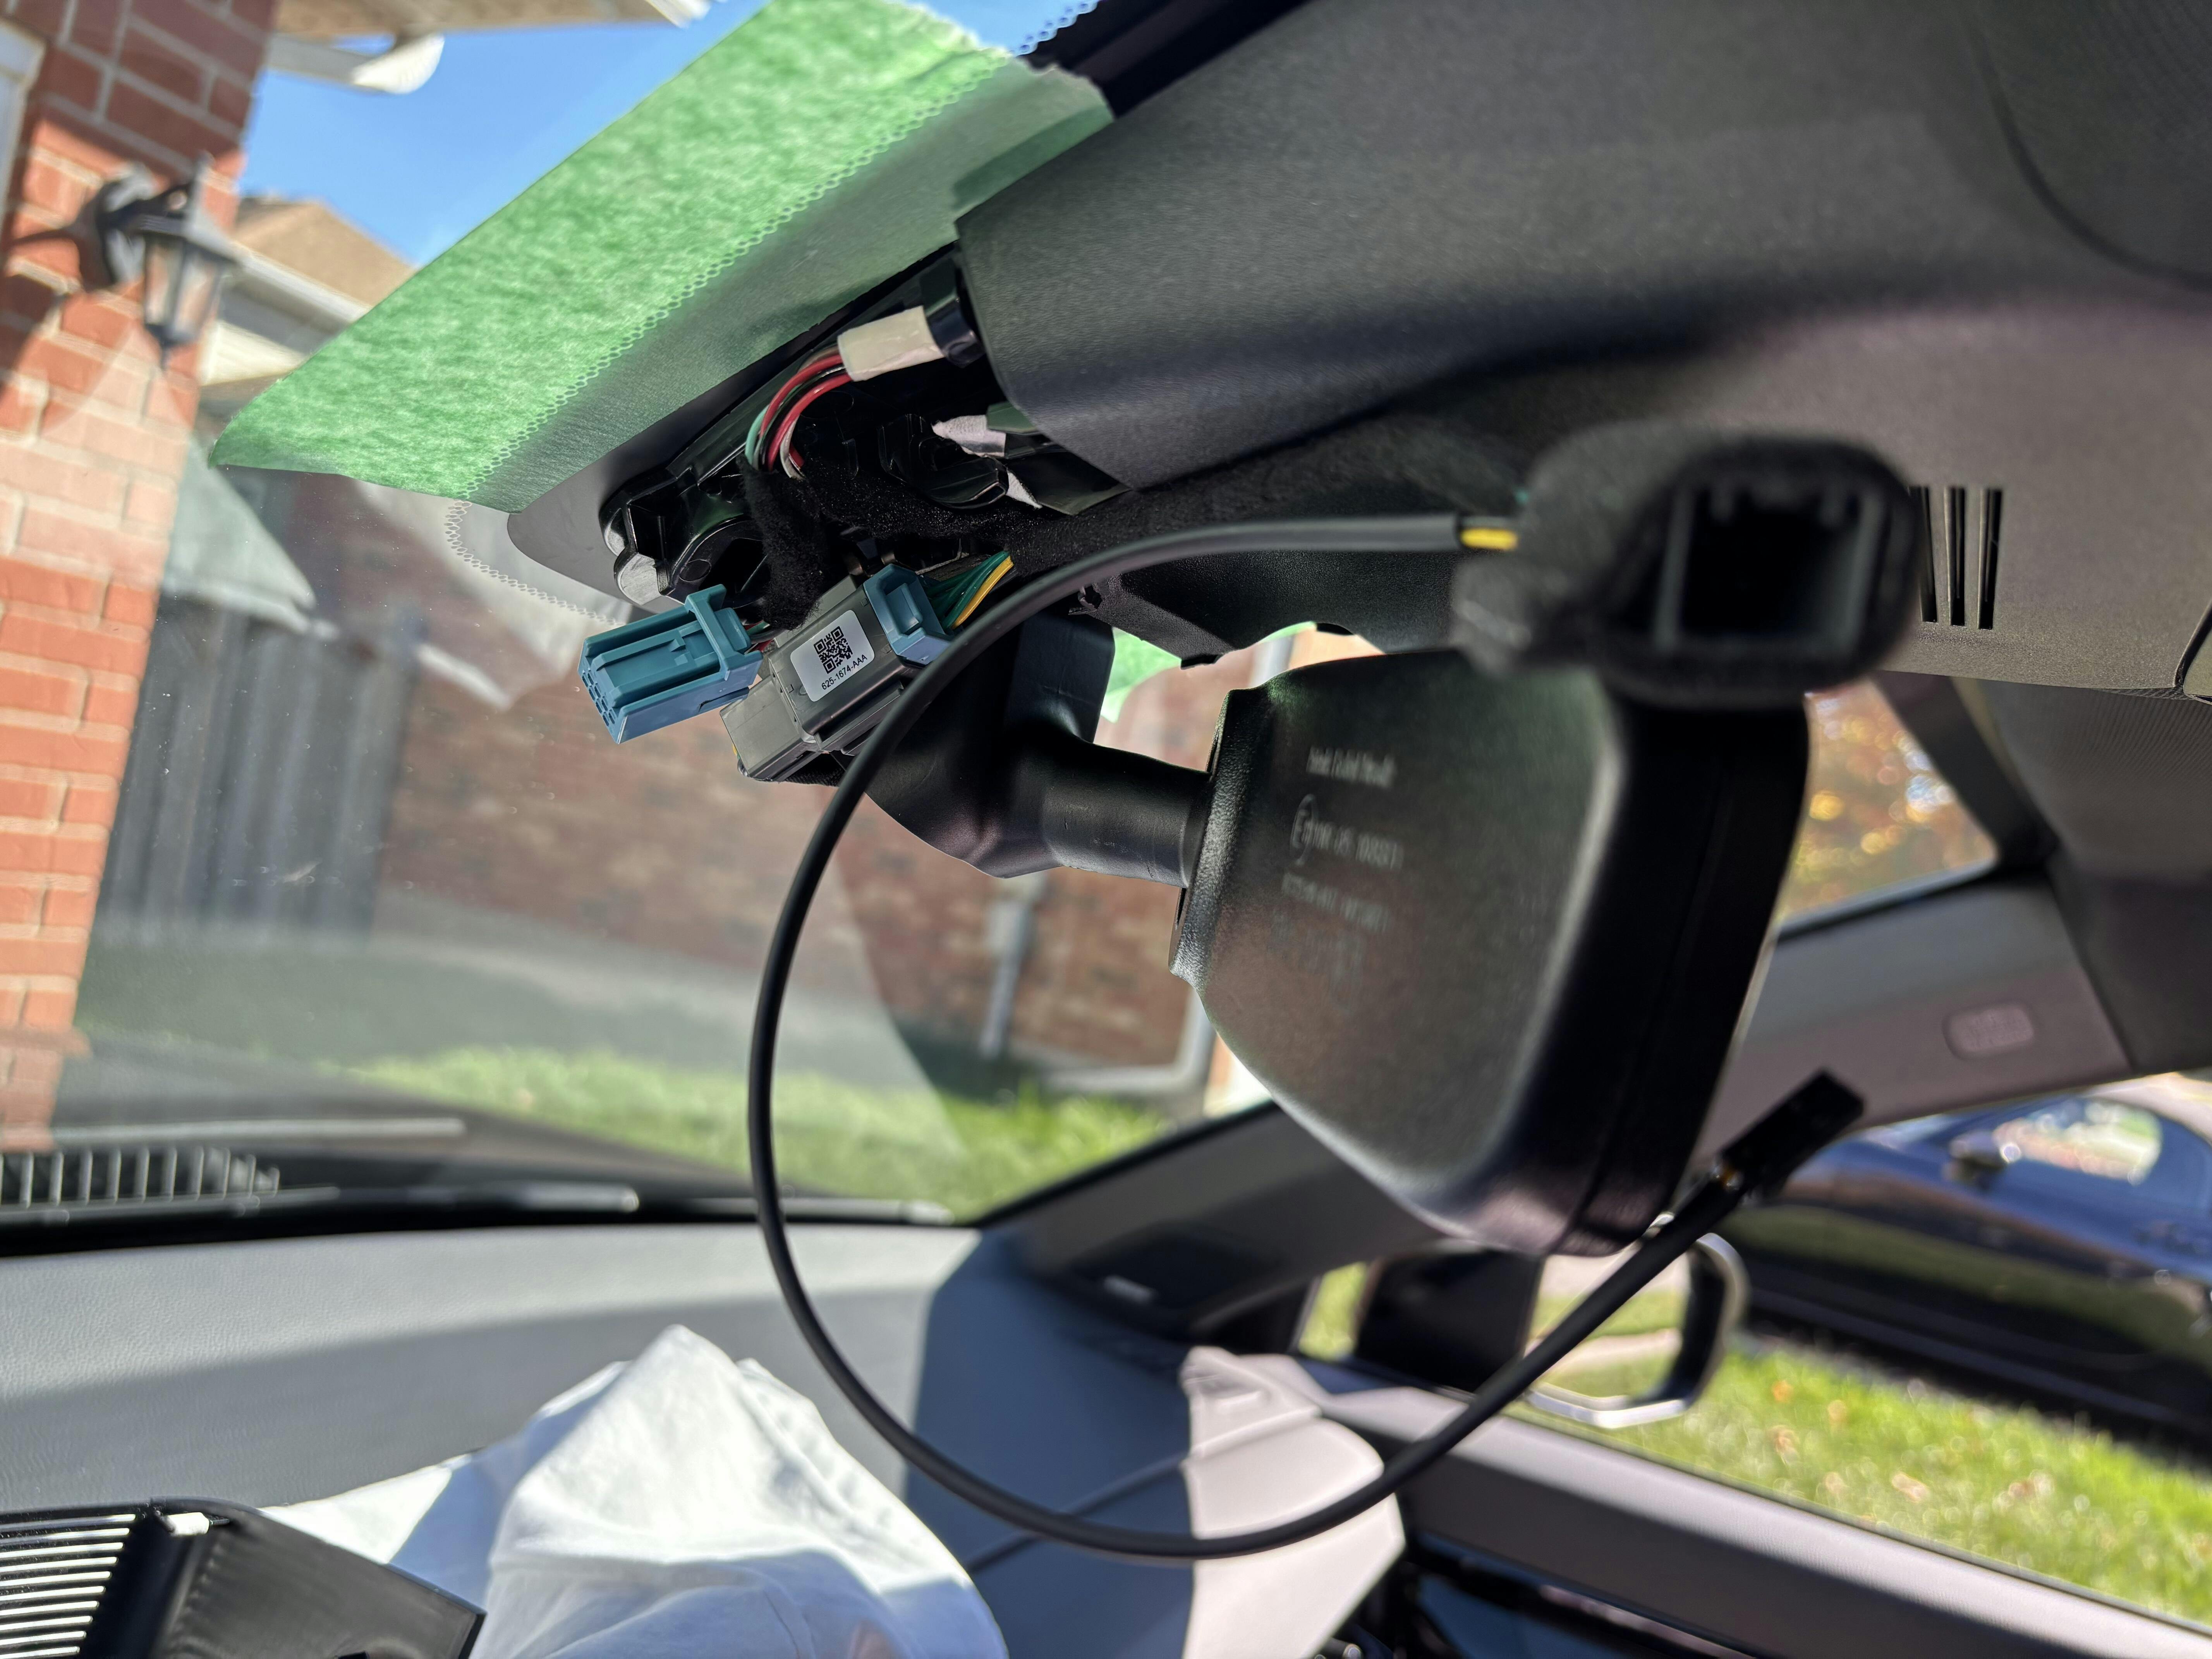
Shows under the plastic trim piece removed in IMG_3. I had disconnected the CRV’s 8 PIN M/F connectors. Notice I taped the windshield for protection.
IMG_5
Shows Dongar’s blue 8 PIN Male connector installed into the CRV’s Female connector and the Dongar 8 PIN Female connector closest to the camera. At this point your job is to loop that wire assembly tightly to connect with the CRV’s blue 8 PIN connector shown on the far left in the picture. As you loop the wire you need to fit it into the space under the plastic trim piece you removed in IMG_3. While you are making that loop and trying to fit all that stuff under the plastic trim piece, you need to fish the remaining wire through the opening where the mirror post comes out the plastic trim pieces. See next picture IMG_6.
IMG_6
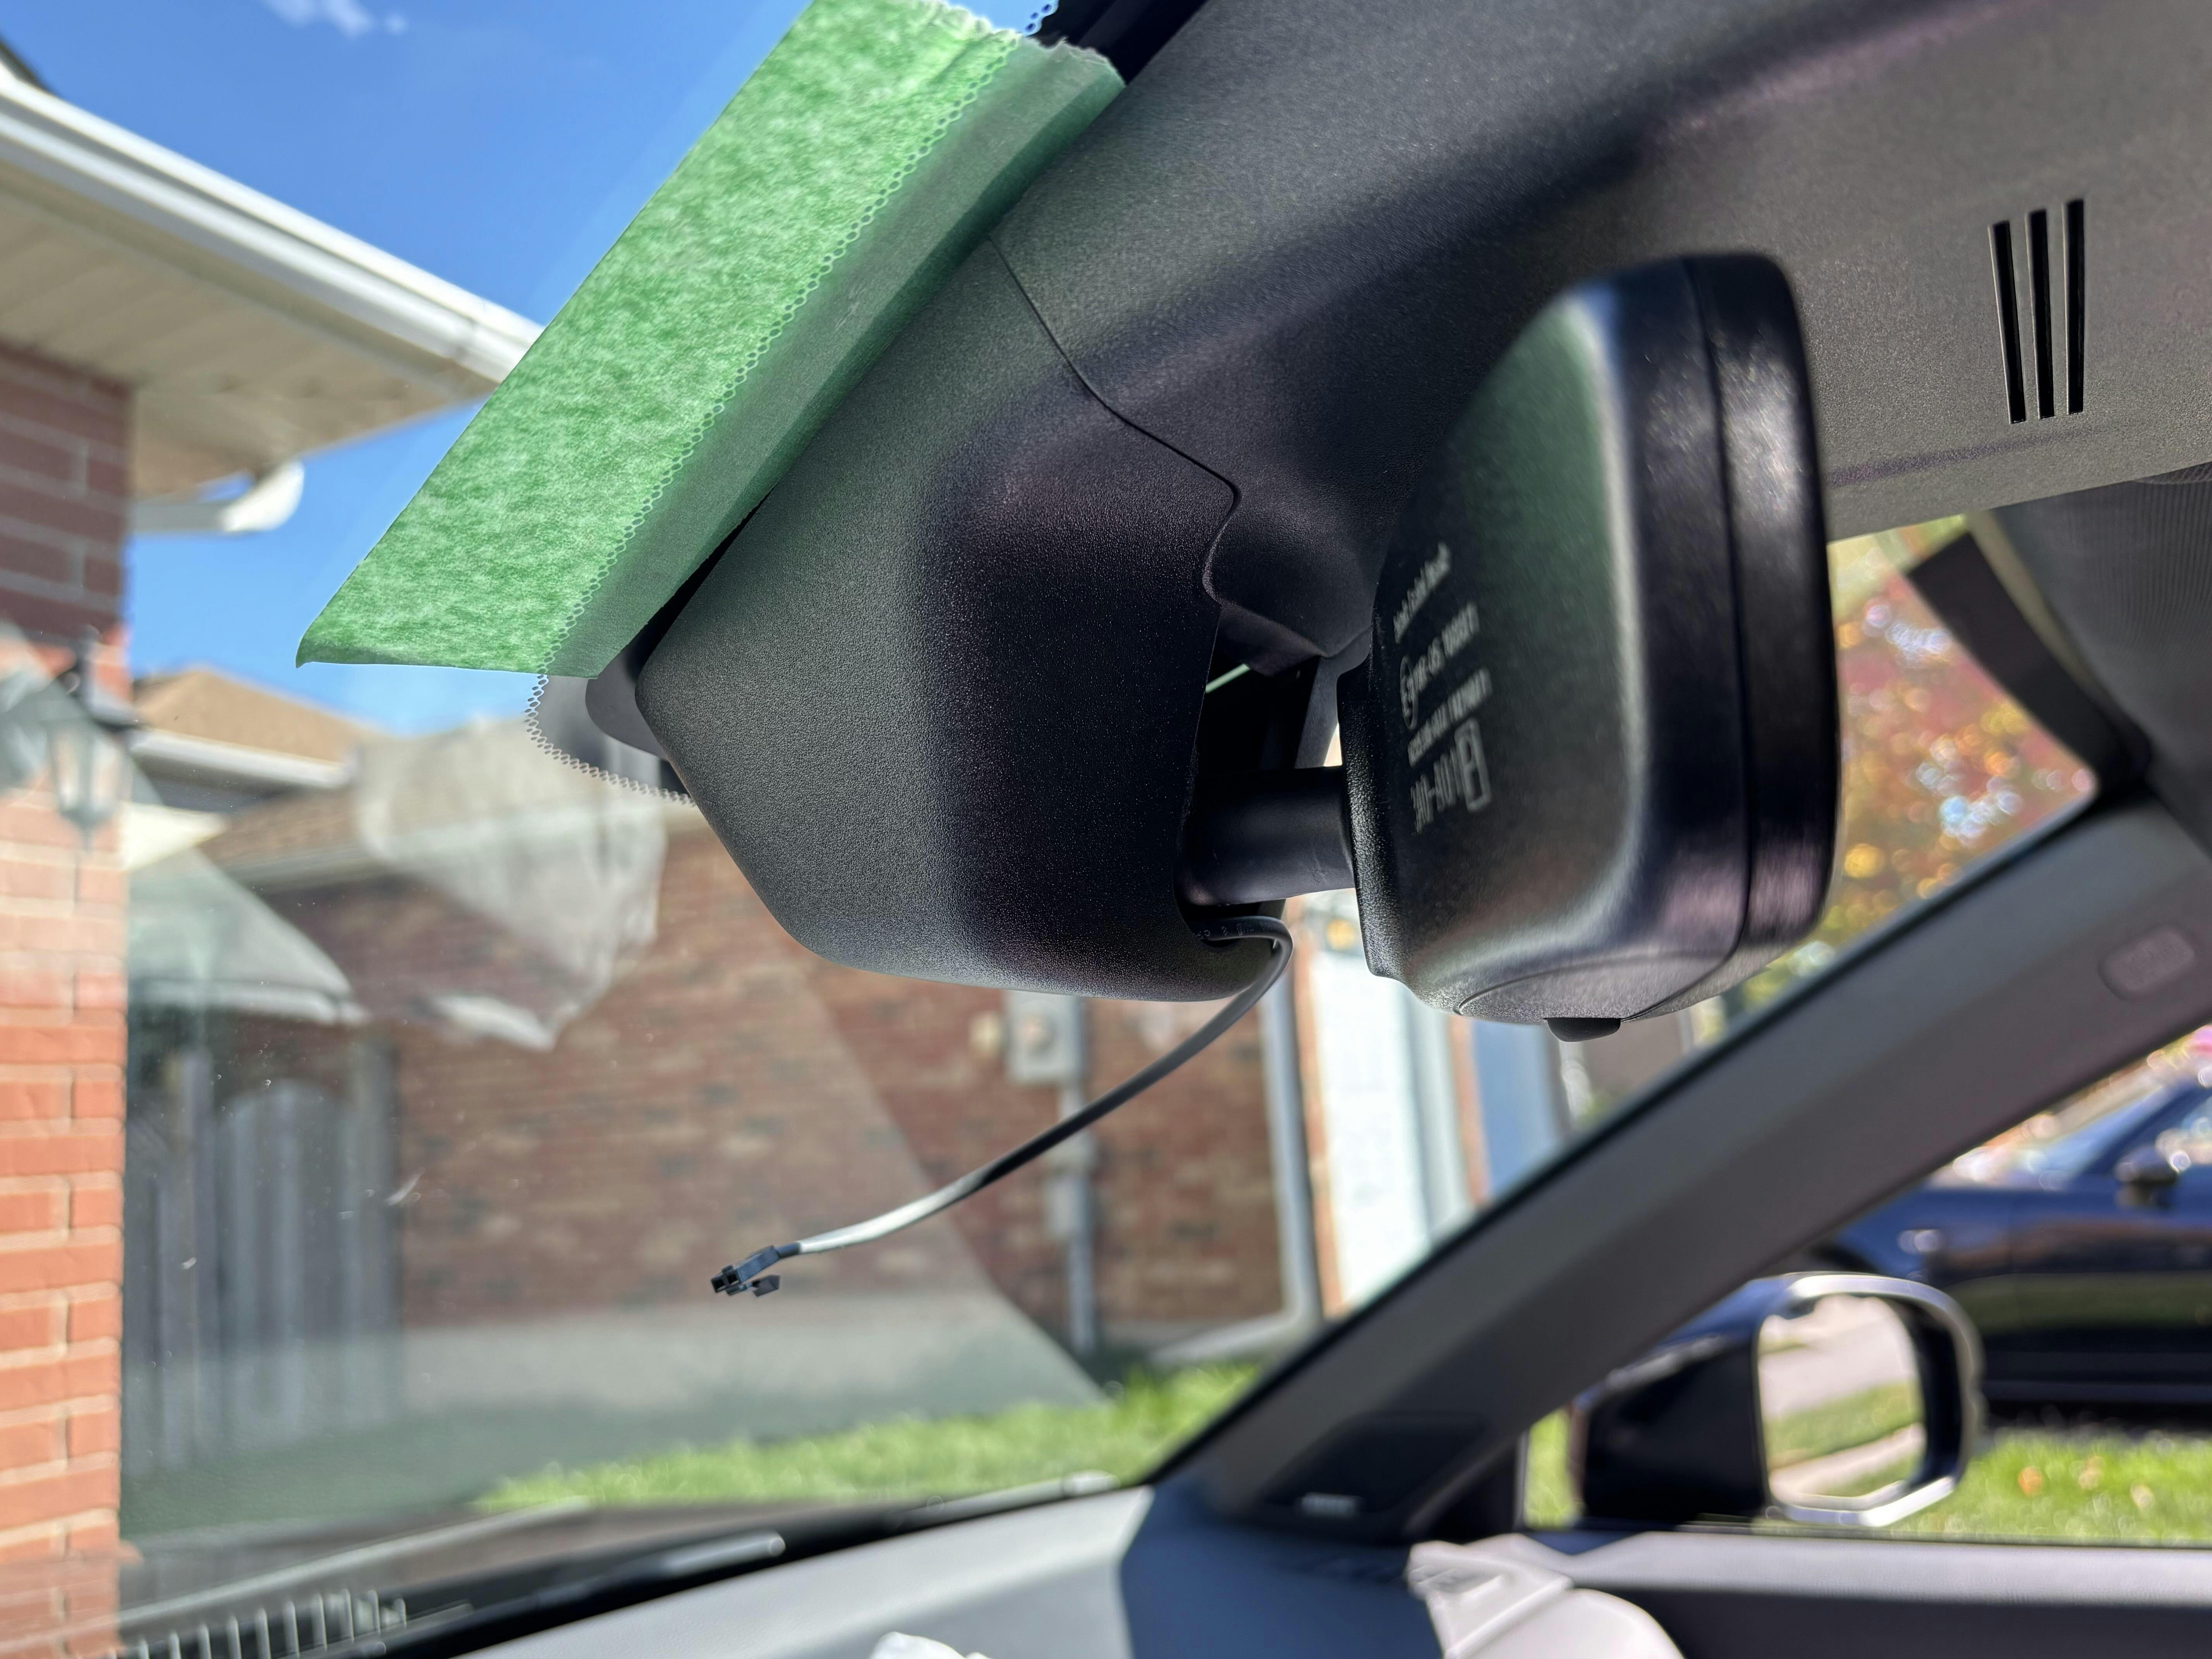
Shows power wire to USB-C Adapter exiting the plastic trim. Just before snapping everything together I would recommend connecting the power to your dash cam to see if it will power it up just to be safe.
IMG_7
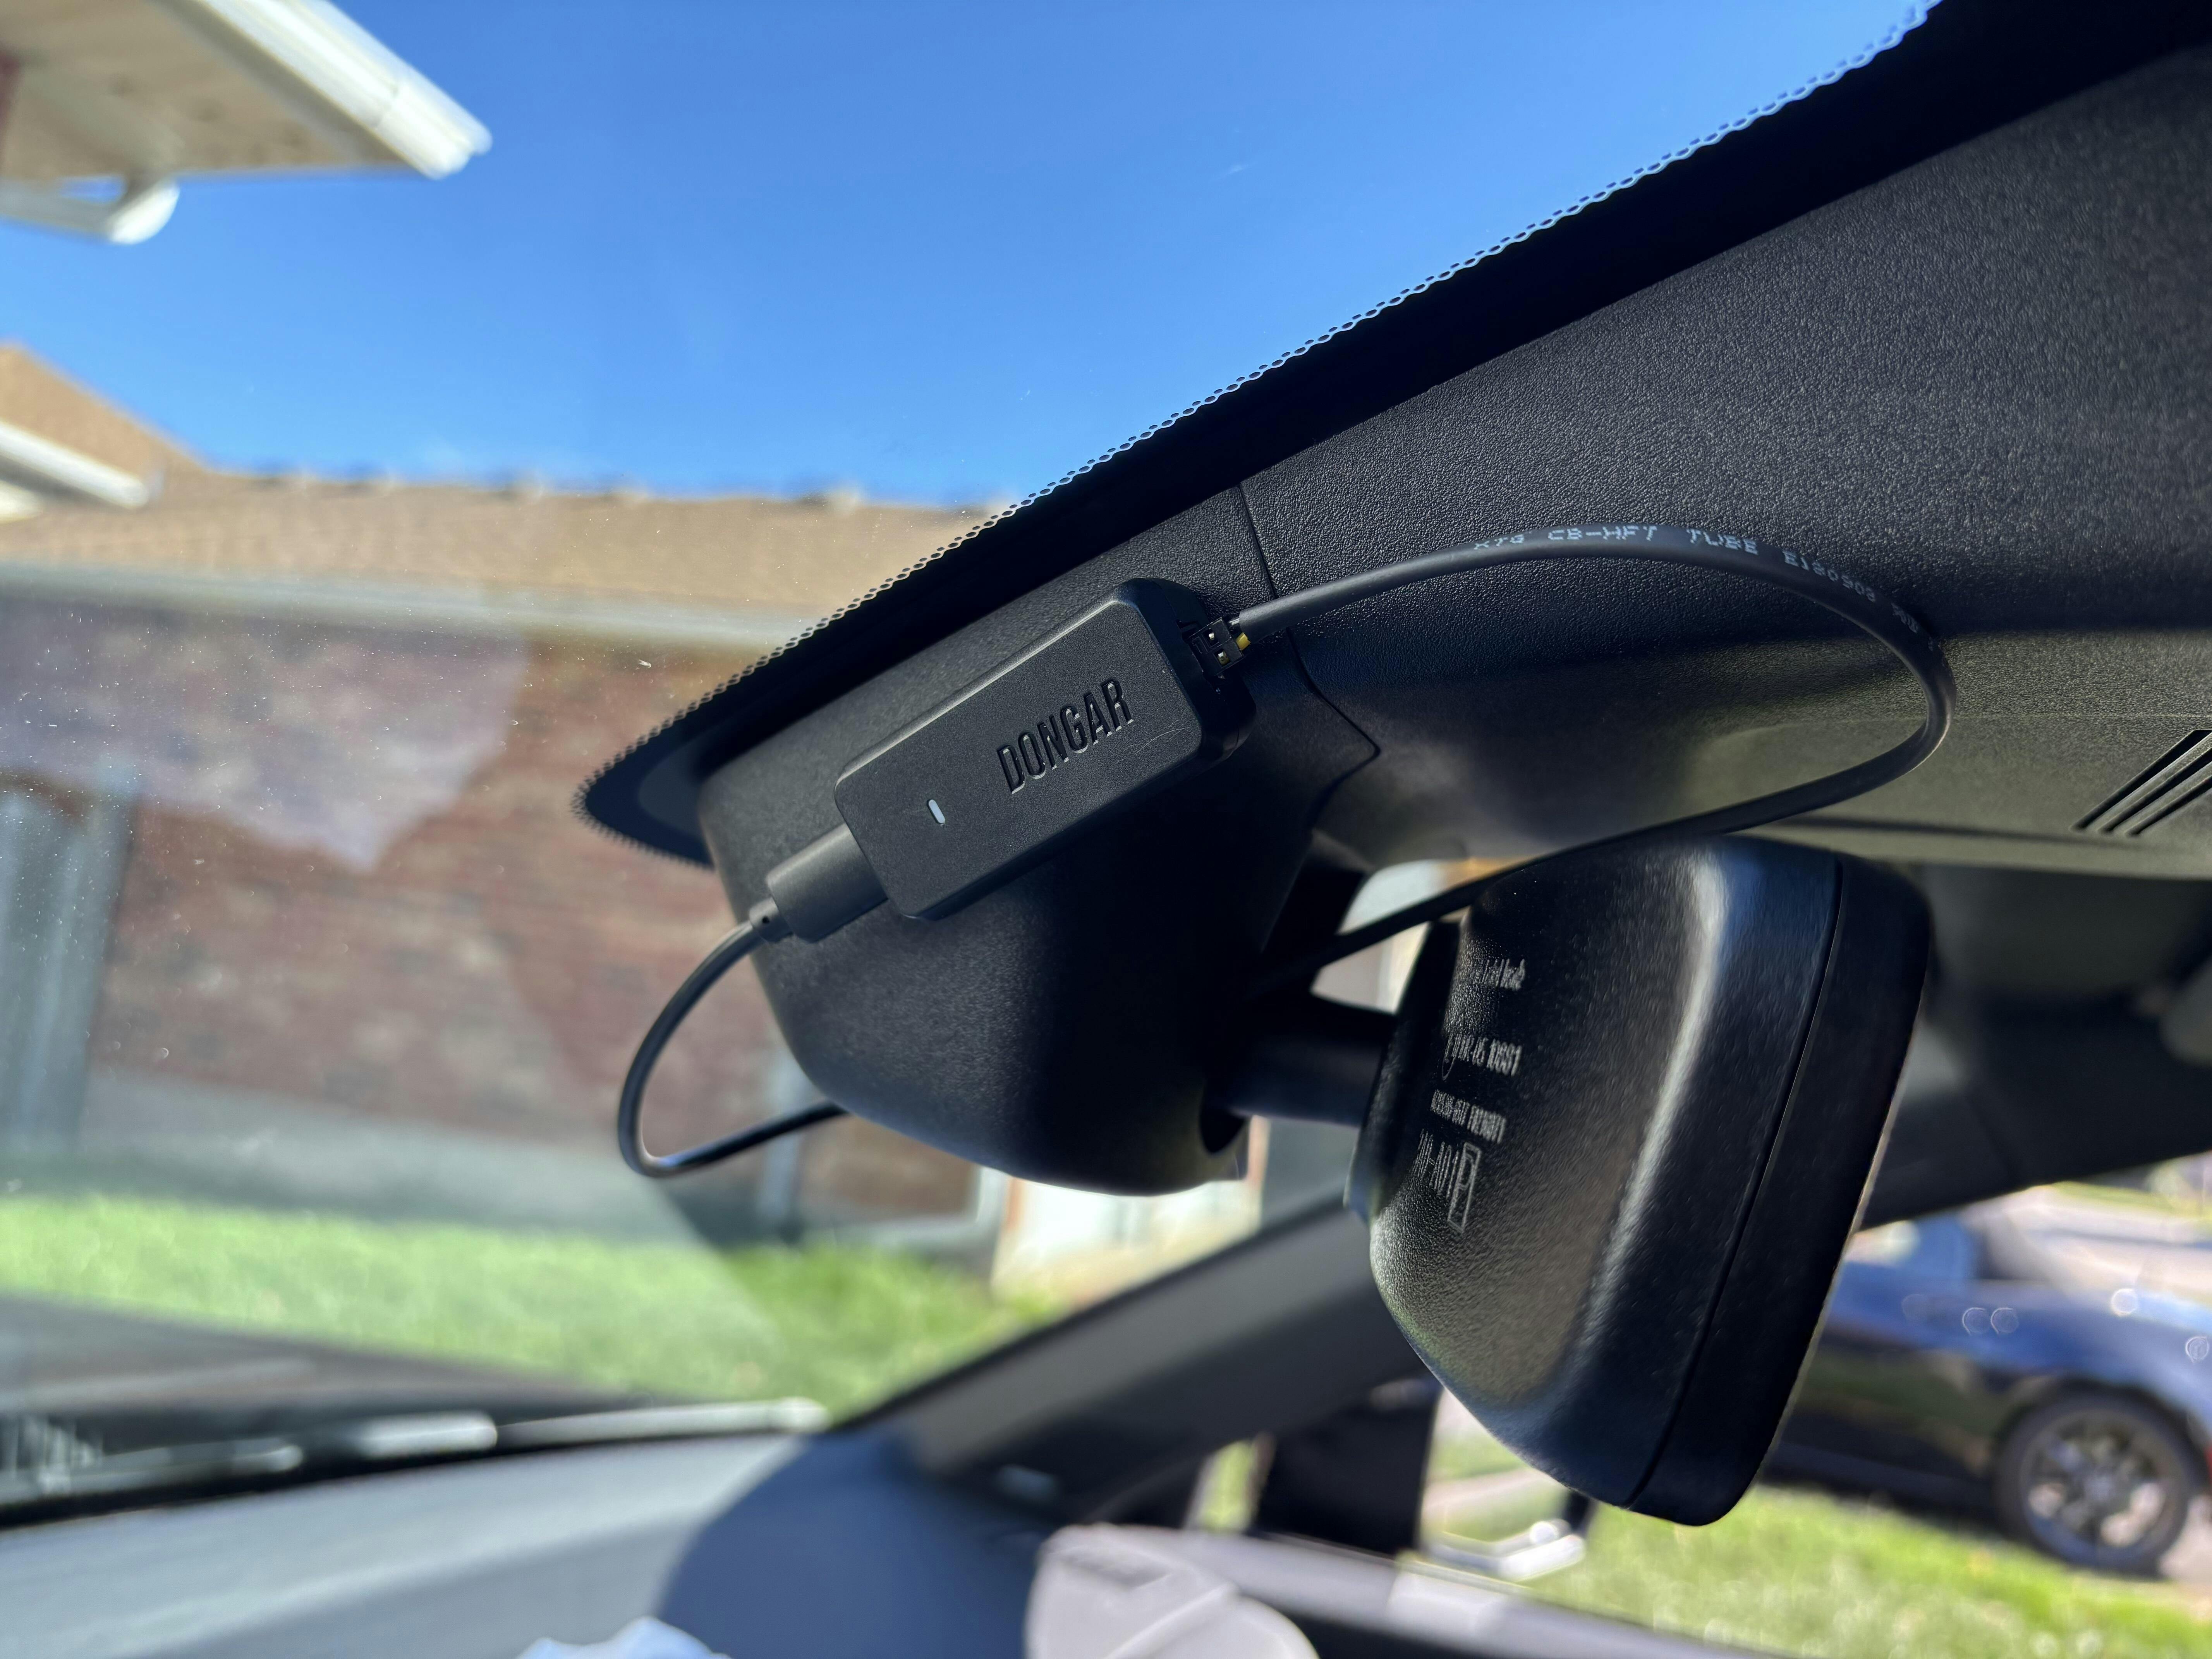
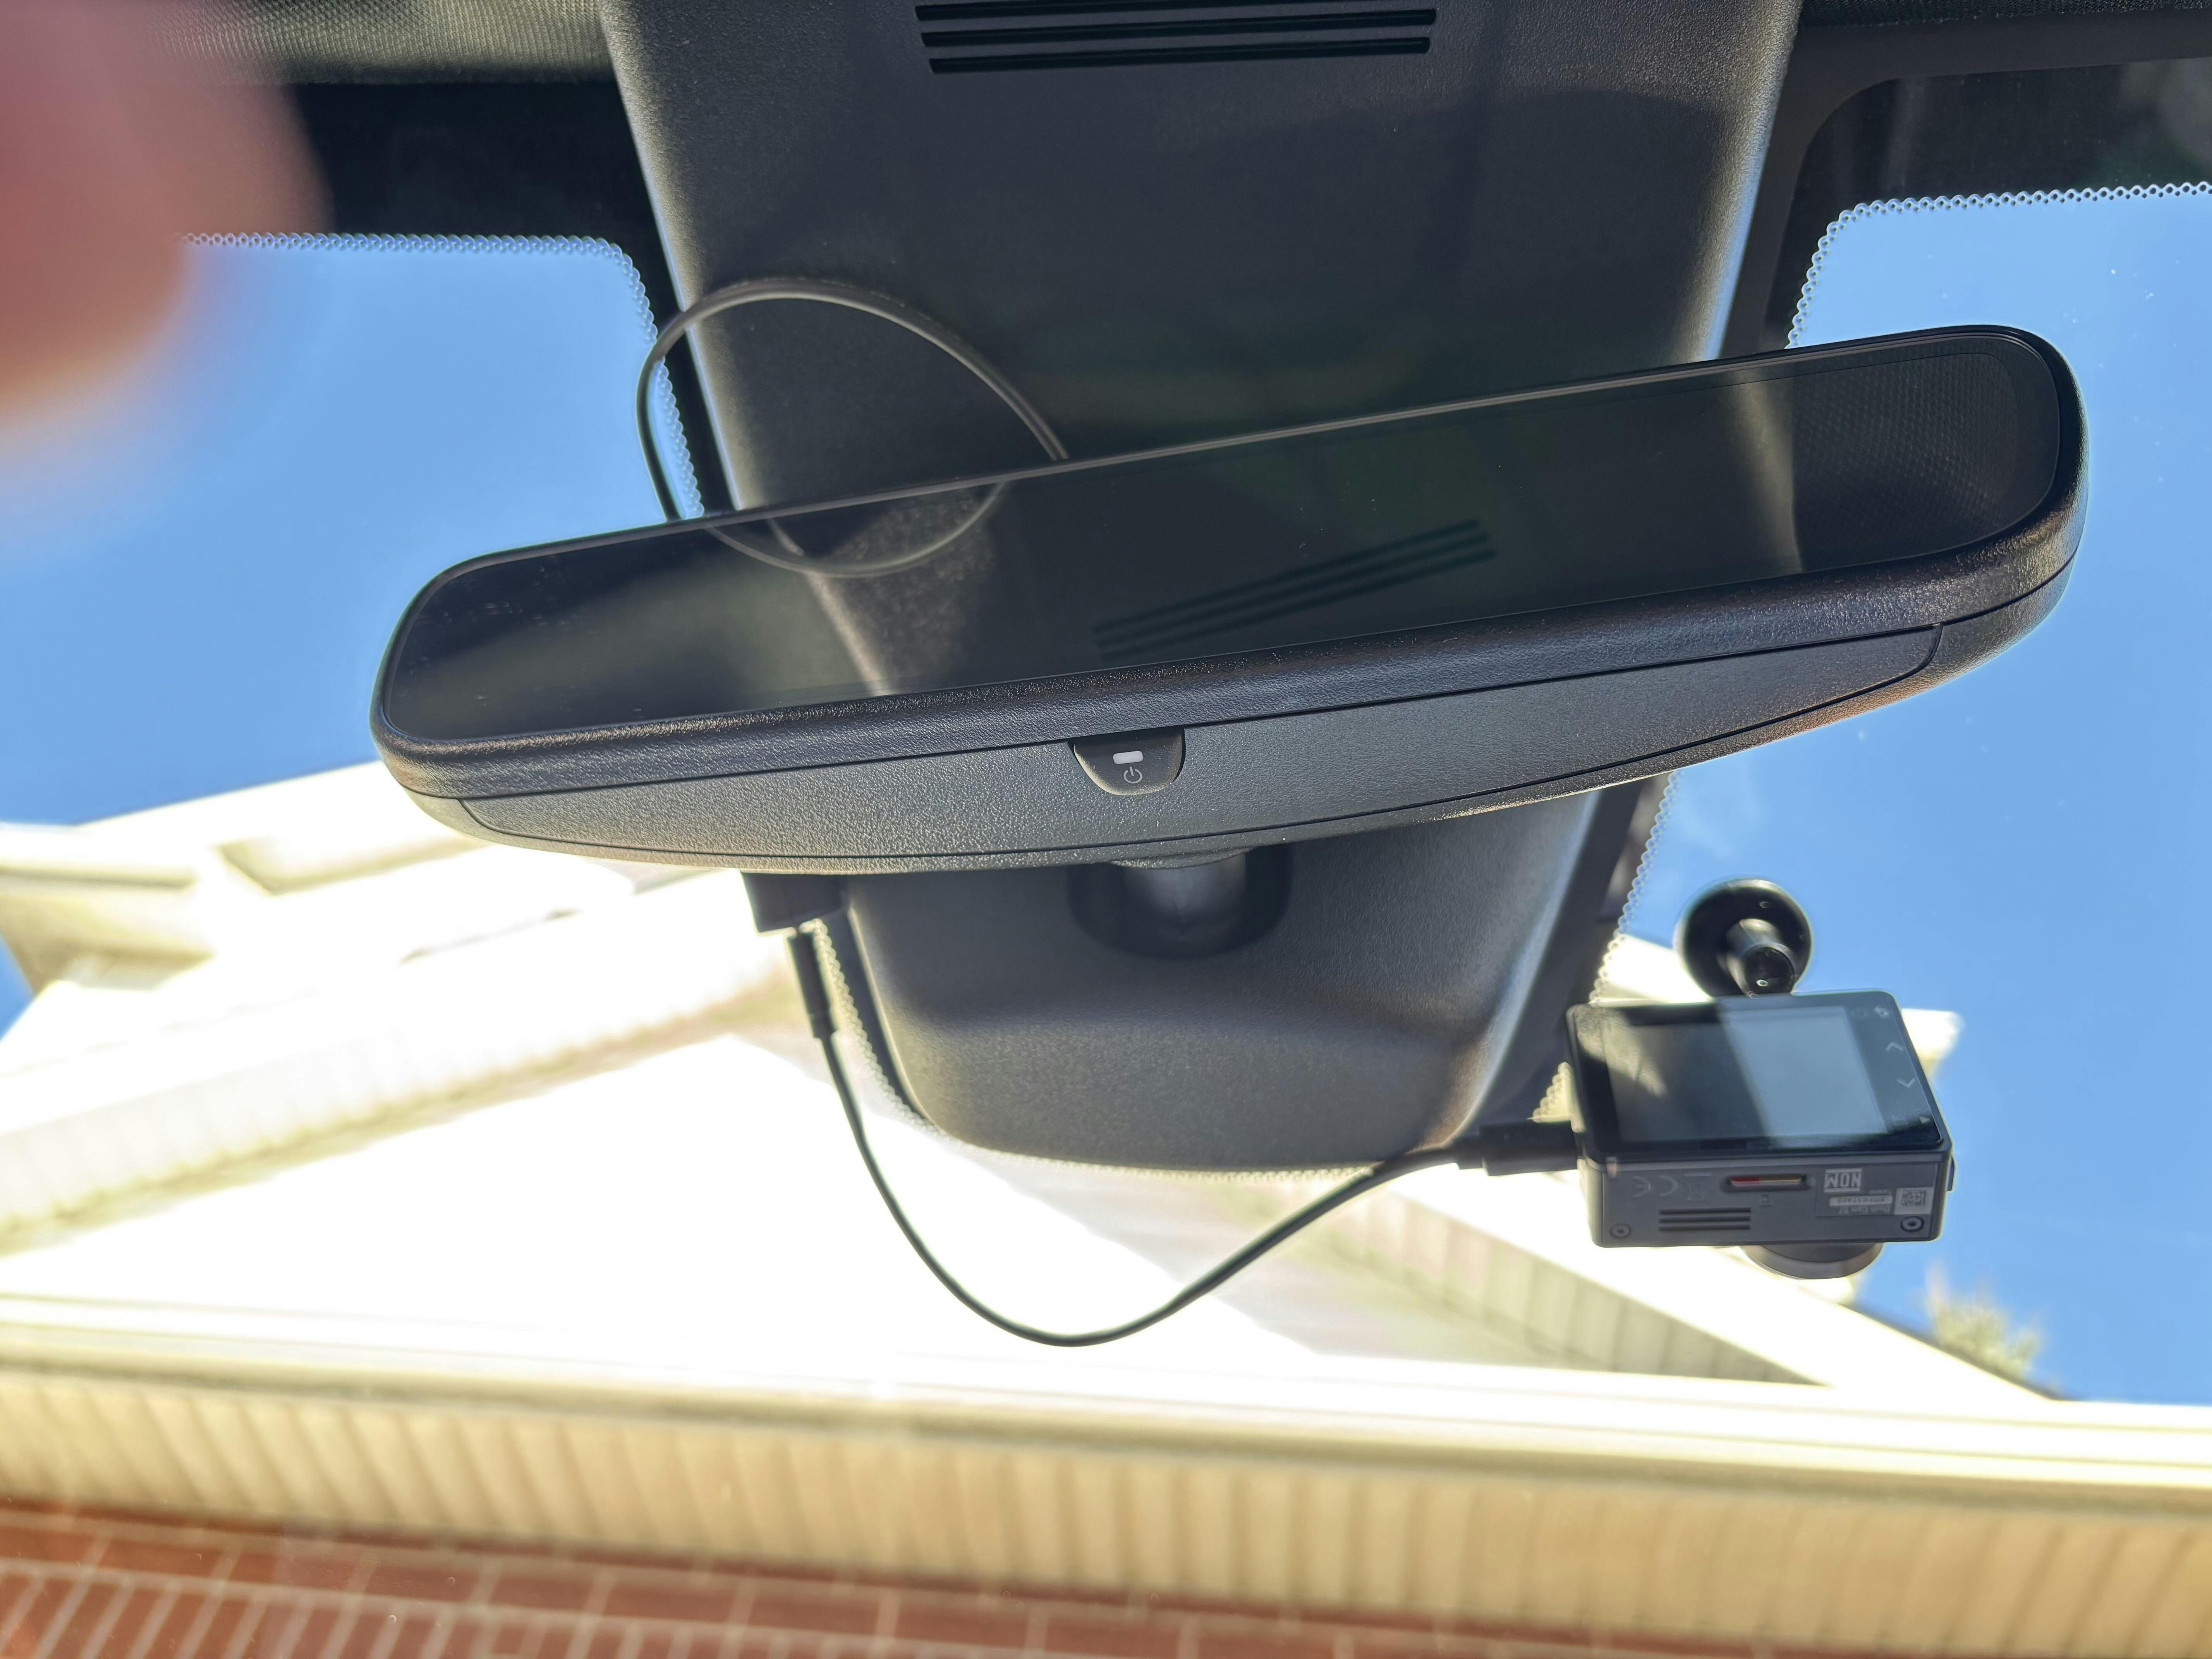
Shows the spot I installed the Dongar USB-C adapter with the supplied 2-way tape.
IMG_8
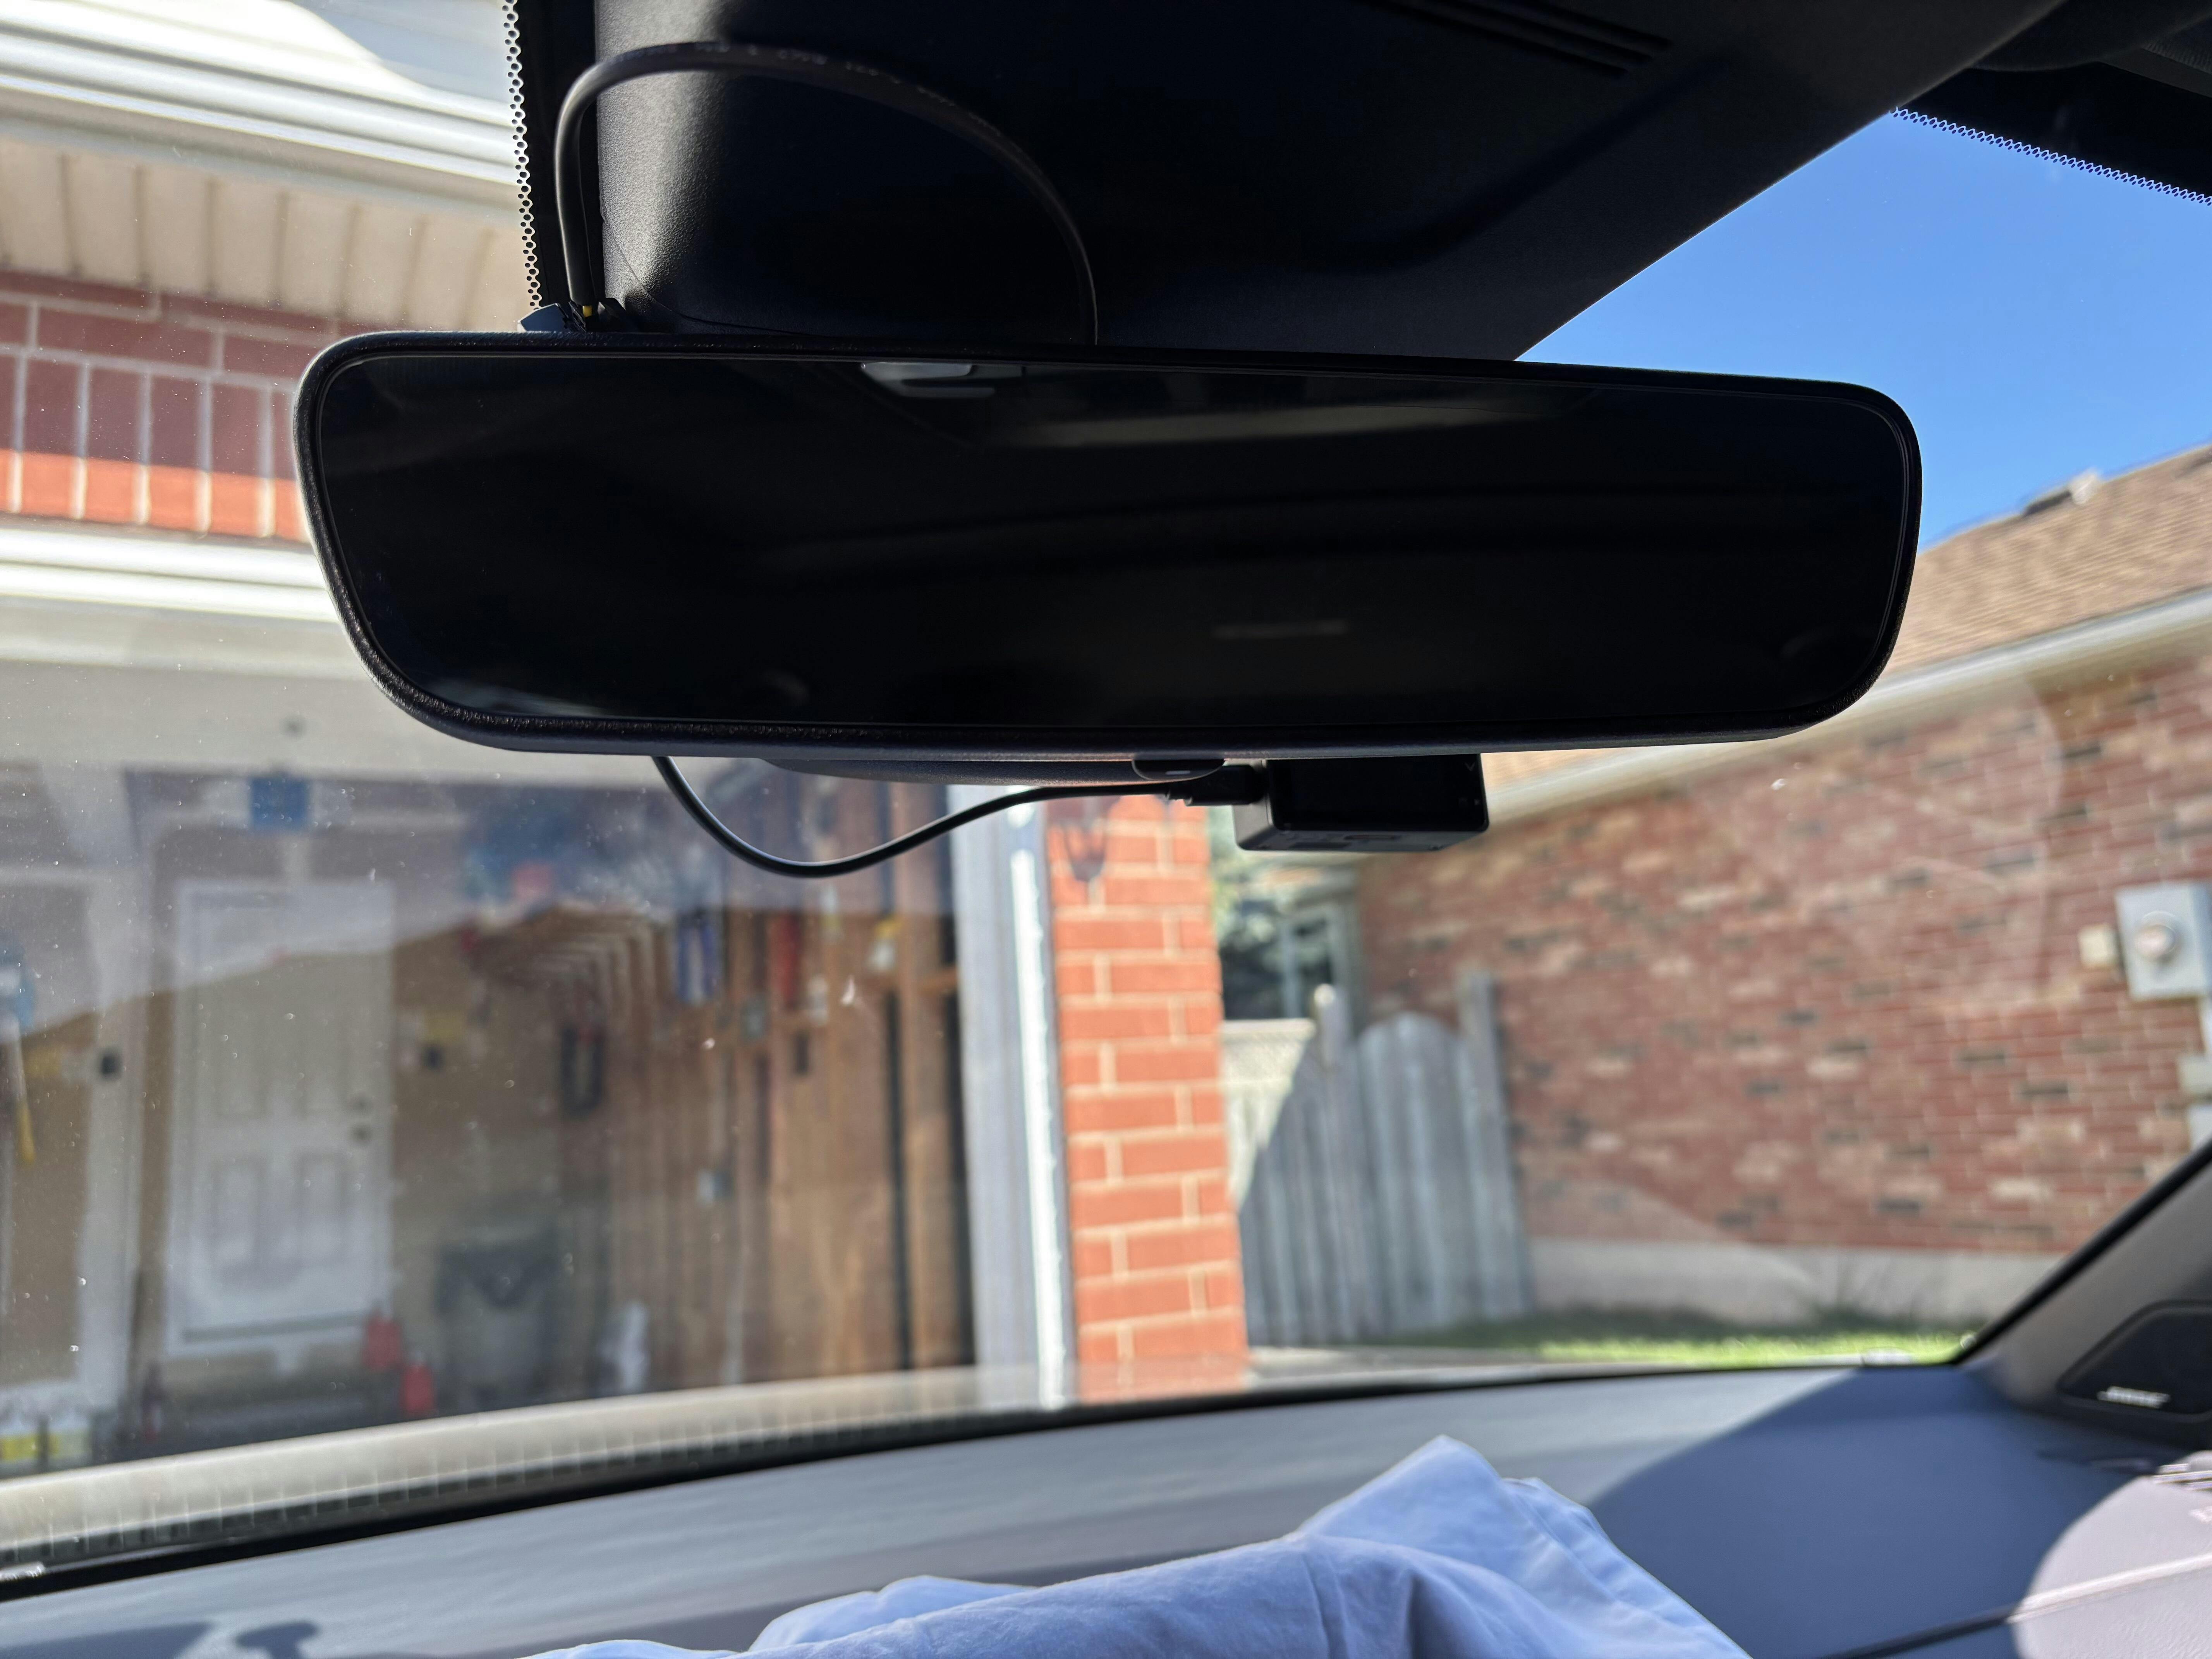
Underside shot.
IMG_9
What I see in the driver’s seat.
I hope this helps. Cheers!
Doug